
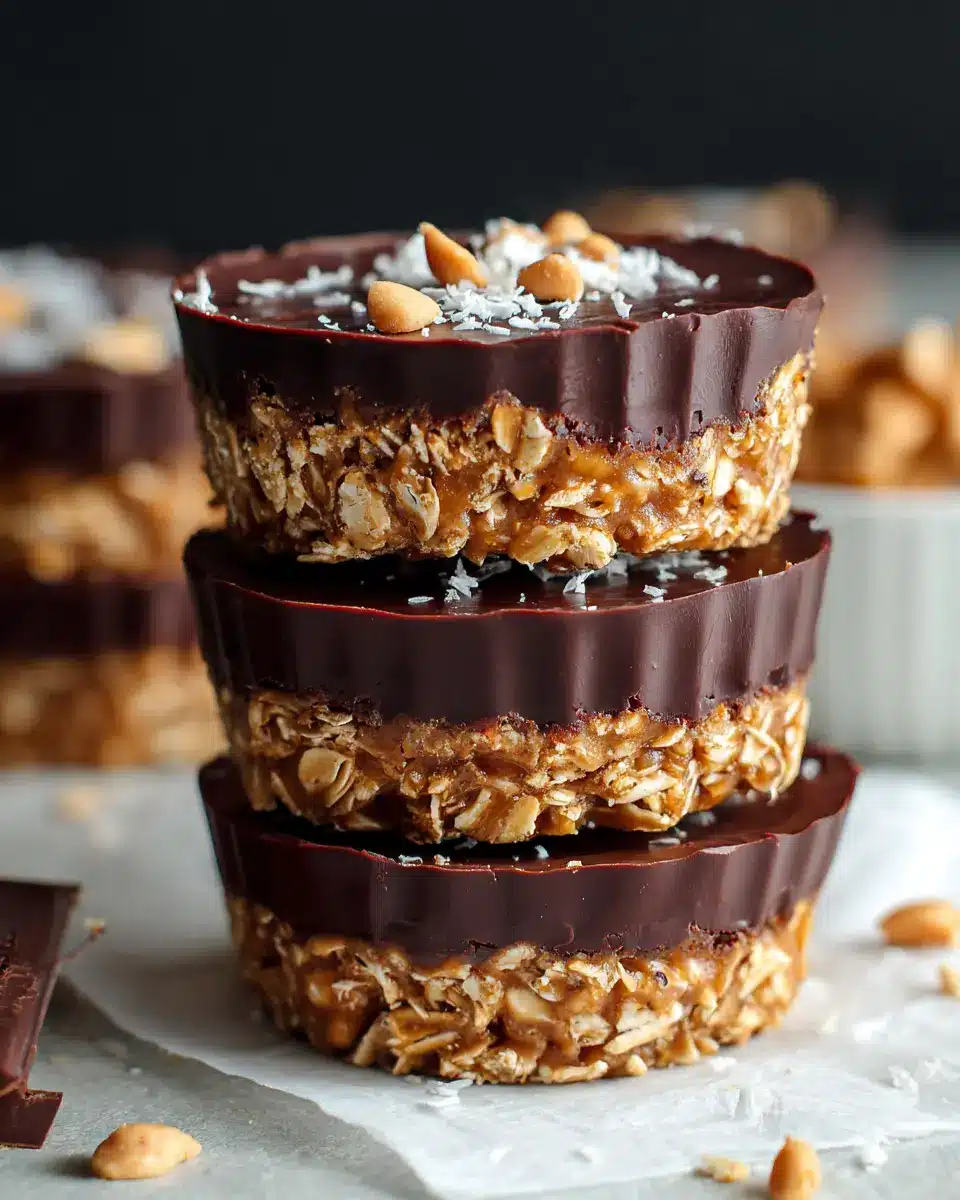
Introduction to No Bake Peanut Butter Oat Cups
Are you juggling a busy schedule and craving a delicious snack that doesn't require your oven? Enter no bake peanut butter oat cups! These delightful treats are perfect for young professionals on the go who want to enjoy something sweet without sacrificing time or effort.
Why No-Bake Snacks Are a Game Changer for Young Professionals
As a young professional, your days can be packed with meetings, deadlines, and errands that leave little time for preparing wholesome snacks. The beauty of no-bake recipes lies in their simplicity. With minimal ingredients and no cooking required, you can whip up a batch of these oat cups in just 15 minutes.
According to the Centers for Disease Control and Prevention, having healthy snacks readily available can help maintain your energy levels and focus throughout the day. These peanut butter oat cups offer the perfect balance of protein, healthy fats, and complex carbohydrates to keep you satisfied.
Imagine reaching into your fridge for a quick, nutritious pick-me-up during that midday slump—no fuss, just pure, honest goodness. Plus, you can customize the ingredients to fit your taste, whether it's adding more nuts, a dash of cinnamon, or even using alternative sweeteners.
Ready to dive into the recipe? Let’s get started!
Ingredients for No Bake Peanut Butter Oat Cups
Creating your own no bake peanut butter oat cups is quick and rewarding! Here's what you'll need to whip together this tasty treat.
Essential Ingredients You'll Need
- 1 cup oats: Rolled oats work perfectly to provide that chewy texture.
- ¼ cup peanuts: A great source of protein and crunch.
- ⅓ cup peanut butter: Choose creamy or crunchy, depending on your preference.
- 3 tablespoon maple syrup: This natural sweetener adds a hint of caramel flavor.
- ¼ cup chopped dark chocolate (60% - 70%): For the perfect rich topping.
- 1 tablespoon coconut oil, melted: Helps bind everything together.
- Sea salt for sprinkling: Enhances all the flavors beautifully.
These ingredients not only combine to create an irresistible snack but also provide a good balance of protein, healthy fats, and fiber.
Optional Ingredients for Customization
Feel free to get creative! You can add:
- Chia seeds or flaxseeds: For an extra boost of omega-3s.
- Dried fruits: Like raisins or cranberries for a sweet twist.
- Coconut flakes: Toasted or untoasted, they add a nice crunch and flavor.
- Spices: A pinch of cinnamon or vanilla extract can elevate the taste.
Customizing your no bake peanut butter oat cups makes them unique and suitable for your taste buds. Plus, these additions can offer even more nutritional benefits!
For more creative snack ideas, check out Healthline’s list of nutritious snacks.
Preparing No Bake Peanut Butter Oat Cups
Making no bake peanut butter oat cups is a delightful way to whip up a healthy snack that’s perfect for any time of the day. These treats are not only satisfying but also incredibly easy to prepare. Let’s walk through the steps together!
Gather Your Tools and Line the Pan
Before we start merging flavors, it’s essential to get organized. Grab a muffin pan or a set of silicone molds. Lining your pan with paper liners can make for an easier cleanup and help you pop the cups out effortlessly later on. Additionally, a good food processor will become your best friend in this recipe!
Melt the Chocolate
Next up, let’s dive into the world of chocolate. Place about ¼ cup of chopped dark chocolate in a heatproof bowl. Set this bowl over a saucepan filled with simmering water—this is known as the double boiler method and ensures even melting without burning. Stir regularly until the chocolate is completely smooth and melted, then set it aside to cool slightly. This step not only offers a delightful topping, but it’s also rich in antioxidants.
Process the Oats and Peanuts
Now, it’s time to create the base for our no bake peanut butter oat cups. In your food processor, add 1 cup of oats and ¼ cup of peanuts. Pulse the mixture until it reaches a coarse, cereal-like consistency. This is where the crunch comes from! Once blended, add 3 tablespoons of maple syrup and the melted coconut oil (don’t forget to let it cool slightly before adding). Blend until all the ingredients are well combined.
Combine and Mold the Mixture
Once combined, it’s time to give the mixture some structure. Divide it evenly among your muffin tins, using your fingers or the back of a spoon to press it down firmly. This compacting is crucial, as it helps the cups hold together once they’re set. Each cup should be generously filled but not overflowing.
Layer with Peanut Butter and Chocolate
This is perhaps the most fun step! With about 1 teaspoon of peanut butter, dollop a portion into each cup and spread it evenly. Then, take your melted chocolate, about 1 tablespoon per cup, and pour it right on top. A sprinkle of sea salt adds a delicious contrast to the rich flavors—a must-try!
Chill and Set
You've done the hard work; now, let the fridge do its magic! Place your muffin pan in the refrigerator for about 1 hour to let the chocolate and peanut butter layer set beautifully. After chilling, these no bake peanut butter oat cups can be popped out and enjoyed immediately or stored in an airtight container for later. Keep them in the fridge for up to seven days or freeze for up to three months for a quick snack!
Now that you know how easy it is to prepare these delightful treats, what are you waiting for? Gather your ingredients and bring some healthy indulgence into your snack time!
Variations on No Bake Peanut Butter Oat Cups
Add-ins for an Extra Crunch
If you love a delightful crunch in your no bake peanut butter oat cups, consider adding ingredients like chopped nuts, seeds, or even some toasted coconut flakes. You can integrate walnuts, almonds, or chia seeds for extra texture and nutrition. Experimenting with these crunchy add-ins not only enhances flavor but also boosts your snack's health benefits.
Flavor Variations
Want to mix it up? Swap out peanut butter for almond or cashew butter to create a new flavor profile in your no bake peanut butter oat cups. The natural sweetness of variations like sunflower seed butter can complement the oats beautifully as well. Additionally, consider adding a dash of cinnamon or a splash of vanilla extract for a cozy twist—you’ll be surprised at how these small changes can elevate your snack experience! For more inspiration, check out this guide on nut butters and find your perfect match.
Cooking Tips and Notes for No Bake Peanut Butter Oat Cups
Common Mistakes to Avoid
While making no bake peanut butter oat cups, be cautious not to skip chilling them in the fridge for at least an hour. This step is crucial for achieving that perfect chocolate crust and firm texture. Also, blending the oats and peanuts too finely can lead to a mushy texture, so aim for a coarse meal. Lastly, be mindful of the peanut butter quantity; adding too much can overwhelm the other flavors.
How to Store for Maximum Freshness
To maintain freshness, keep your no bake peanut butter oat cups in an airtight container. They will last up to seven days in the fridge. If you're looking to enjoy them later, you can freeze them for up to three months. Just be sure to layer parchment paper between cups if you're stacking them. For a personalized touch, consider trying out other nut butters like almond or cashew as a twist!
Serving Suggestions for No Bake Peanut Butter Oat Cups
Pairing Ideas for Snacks on the Go
These no bake peanut butter oat cups are perfect for a quick snack, but pairing them can elevate your munching experience! Try serving them with:
- Greek yogurt: The creamy texture complements the crunch of the oat cups beautifully.
- Fruit slices: Fresh apples, bananas, or berries add a refreshing contrast.
- Nut milk: A glass of almond or oat milk makes for a wholesome snack break.
These combinations not only enhance flavor but also keep you fueled throughout your busy day.
Creative Ways to Serve at Gatherings
When it comes to gatherings, presentation can make all the difference! Consider these creative serving ideas for your no bake peanut butter oat cups:
- Mini dessert platters: Arrange the cups on a vibrant tray surrounded by fresh fruits and nuts.
- Personalized take-home bags: Wrap individual cups in clear bags tied with a ribbon for guests to enjoy later.
- Dessert buffet: Include other quick treats like energy balls or fruit skewers for a delightful spread.
These unique serving suggestions will not only impress your guests but also create a fun and interactive dining experience!
Time Breakdown for No Bake Peanut Butter Oat Cups
Preparation Time
The prep for your no bake peanut butter oat cups takes just 15 minutes. That’s less time than it takes to find an outfit for the day! Gather your ingredients, and let’s get mixing.
Setting Time
After you've prepared the cups, they’ll need about an hour in the fridge to set properly. This waiting time allows the chocolate to firm up perfectly and the flavors to meld.
Total Time
In total, you're looking at 1 hour and 15 minutes from start to finish. While it's quick, the deliciousness of these cups will make you feel like you've spent a lot longer crafting a culinary masterpiece!
These delightful snacks are perfect for busy days when you crave something sweet yet nutritious. If you're keen on making healthy munchies, don’t forget to check out our favorite healthy snack tips for even more inspirations!
Nutritional Facts for No Bake Peanut Butter Oat Cups
Calories per Serving
These no bake peanut butter oat cups are a delicious and satisfying treat, with each serving containing approximately 160 calories. Perfect for a pick-me-up or a post-workout snack, they’re designed to fuel your day without derailing your healthy eating habits.
Macro Breakdown
Each serving provides a balanced blend of macronutrients to keep you energized:
- Protein: 5 grams
- Fats: 9 grams
- Carbohydrates: 14 grams
With wholesome ingredients like oats, peanut butter, and dark chocolate, you'll not only enjoy a tasty snack but also nourish your body with quality nutrients. Don't hesitate to check out the health benefits of oats and peanut butter for more insights on why these ingredients are great for you!
More on Nutritional Balance
In summary, these no bake peanut butter oat cups are rich in healthy fats and fiber, making them a smart choice for anyone looking to snack wisely. Plus, with their quick preparation and no-bake nature, they fit seamlessly into the busy lives of young professionals. For a deeper dive into the health benefits of oats and how they can enhance your diet, consider exploring resources from the Whole Grains Council and American Heart Association.
FAQs about No Bake Peanut Butter Oat Cups
Can I use a different nut butter?
Absolutely! If you're looking to mix things up, feel free to substitute peanut butter with almond butter, cashew butter, or sunflower seed butter. Each will give your no bake peanut butter oat cups a unique flavor while still providing that creamy texture we all love.
How long will these last in the fridge?
When stored in an airtight container, your no bake peanut butter oat cups will stay fresh in the fridge for about seven days. They might even taste better as the flavors meld together over time! If you need a longer shelf life, pop them in the freezer where they can last up to three months.
Are these suitable for meal prep?
Absolutely! These no bake peanut butter oat cups are perfect for meal prep. With just a bit of time, you can whip up a batch at the beginning of the week, giving you a healthy snack on hand whenever you need it. Plus, they’re easy to grab and go, making them a great option for busy young professionals.
For more delicious variations on snacks, check out this fantastic article on healthy meal prep ideas.
Conclusion on No Bake Peanut Butter Oat Cups
Why you should try making these today
These no bake peanut butter oat cups are not just incredibly tasty; they’re also simple to whip up! With just 15 minutes of prep, you can enjoy a delicious, healthy snack that satisfies your sweet tooth. Plus, they’re perfect for meal prep and can be stored for up to three months. Try making them today to elevate your snack game!
No Bake Peanut Butter Oat Cups
Equipment
- Cupcake pan
- Silicone mold
- bowl
- Saucepan
- Food processor
Ingredients
- 1 cup oats
- ¼ cup peanuts
- ⅓ cup peanut butter
- 3 tablespoon maple syrup
- ¼ cup chopped dark chocolate 60% - 70%
- 1 tablespoon coconut oil melted
- sea salt for sprinkling
Instructions
- Line a cupcake pan or set aside a silicone mold.
- Put chocolate into a bowl and set it over a saucepan filled with simmering water. Stir until chocolate is completely melted and set aside.
- Melt the coconut oil and set aside.
- Blend oats and peanuts in a food processor to create a coarse cereal.
- Add in the melted coconut oil and maple syrup. Pulse again until well combined. The cereal will be loose and will not stick together completely.
- Divide the mixture evenly between the muffin tins, pushing down firmly.
- Pour a little peanut butter (approximately 1 teaspoon) into each cup. Make sure it's spread out evenly.
- Top with melted chocolate (approximately 1 Tablespoon) and a bit of sea salt.
- Place in the fridge for an hour.
- You can keep any leftovers in an airtight container. Store them up to three months in the freezer or seven days in the fridge.


Leave a Reply