
Introduction to Spicy Pickled Garlic Scapes
If you're looking to elevate your culinary game, you need to try spicy pickled garlic scapes. These vibrant green stalks, harvested before the garlic bulb fully matures, are not only crunchy but also packed with flavor. When pickled, they transform into a zesty treat that can brighten up salads, sandwiches, and grilled dishes alike.
Why are pickled garlic scapes a game changer? For one, they offer an intriguing depth of flavor that's often missing from traditional pickles. The garlic essence, combined with a tangy vinegar brine and a kick of heat from chili flakes, makes these scapes a versatile condiment in your kitchen. Plus, they're loaded with nutrients, providing health benefits such as antioxidants and anti-inflammatory properties.
If you're new to pickling or want quick results, this recipe is incredibly simple. Within just 30 minutes, you’ll have two quart-sized jars ready for your fridge! For more inspiration, check out this article from Food52 on the health benefits of garlic. As the scapes absorb the brine, they'll develop a tantalizing flavor that keeps you coming back for more. So why not try your hand at making spicy pickled garlic scapes today?
Ingredients for Spicy Pickled Garlic Scapes
Creating the perfect spicy pickled garlic scapes is all about choosing the right ingredients. Let’s gather what you’ll need for this delightful recipe.
Fresh Garlic Scapes
- 1 pound garlic scapes: These are the star of the show! Make sure to pick scapes that are firm and vibrant for the best flavor.
Brine Components
- 1 cup distilled white vinegar: This adds the crucial tang that makes pickles irresistibly zesty.
- 1 cup water: Balances the vinegar and creates a nice brine consistency.
- 2 tablespoons kosher salt: Enhances flavor while helping with preservation.
- 2 tablespoons granulated sugar: Cuts through the acidity while delivering a hint of sweetness.
Spices and Flavorings
- 1 teaspoon black peppercorns: Adds subtle heat and depth.
- 1 teaspoon mustard seeds: Infuses a lovely burst of flavor.
- 1 teaspoon coriander seeds: Complements the garlic’s natural flavor.
- 1 teaspoon red chili flakes: Adjust this depending on your spice preference.
- 4 cloves garlic, peeled and smashed: A must-have for a garlicky punch.
- 1 bay leaf: For a touch of earthy flavor.
- Optional: ½ teaspoon turmeric: For a beautiful yellow hue.
With these ingredients, you’ll be well-equipped to craft your own vibrant spicy pickled garlic scapes. What’s your favorite way to enjoy pickles—on sandwiches or as a side dish?
Preparing Spicy Pickled Garlic Scapes
Creating spicy pickled garlic scapes at home is a rewarding DIY kitchen project that will elevate your culinary skills while tantalizing your taste buds. With just a few ingredients and straightforward steps, you’ll have a zesty and crunchy condiment ready to enhance every dish. Let’s dive into how to prepare these delightful pickles!
Gather Your Ingredients
Before diving into the process, it’s crucial to gather all the necessary ingredients for your spicy pickled garlic scapes. Here’s what you’ll need:
- 1 pound of garlic scapes
- 1 cup distilled white vinegar
- 1 cup water
- 2 tablespoons kosher salt
- 2 tablespoons granulated sugar
- Spices: black peppercorns, mustard seeds, coriander seeds, and red chili flakes
- 4 cloves of garlic
- 1 bay leaf
- Optional: turmeric for extra color
Having everything at hand not only makes the cooking process smoother but also allows you to enjoy the moment without unnecessary interruptions.
Prepare the Garlic Scapes
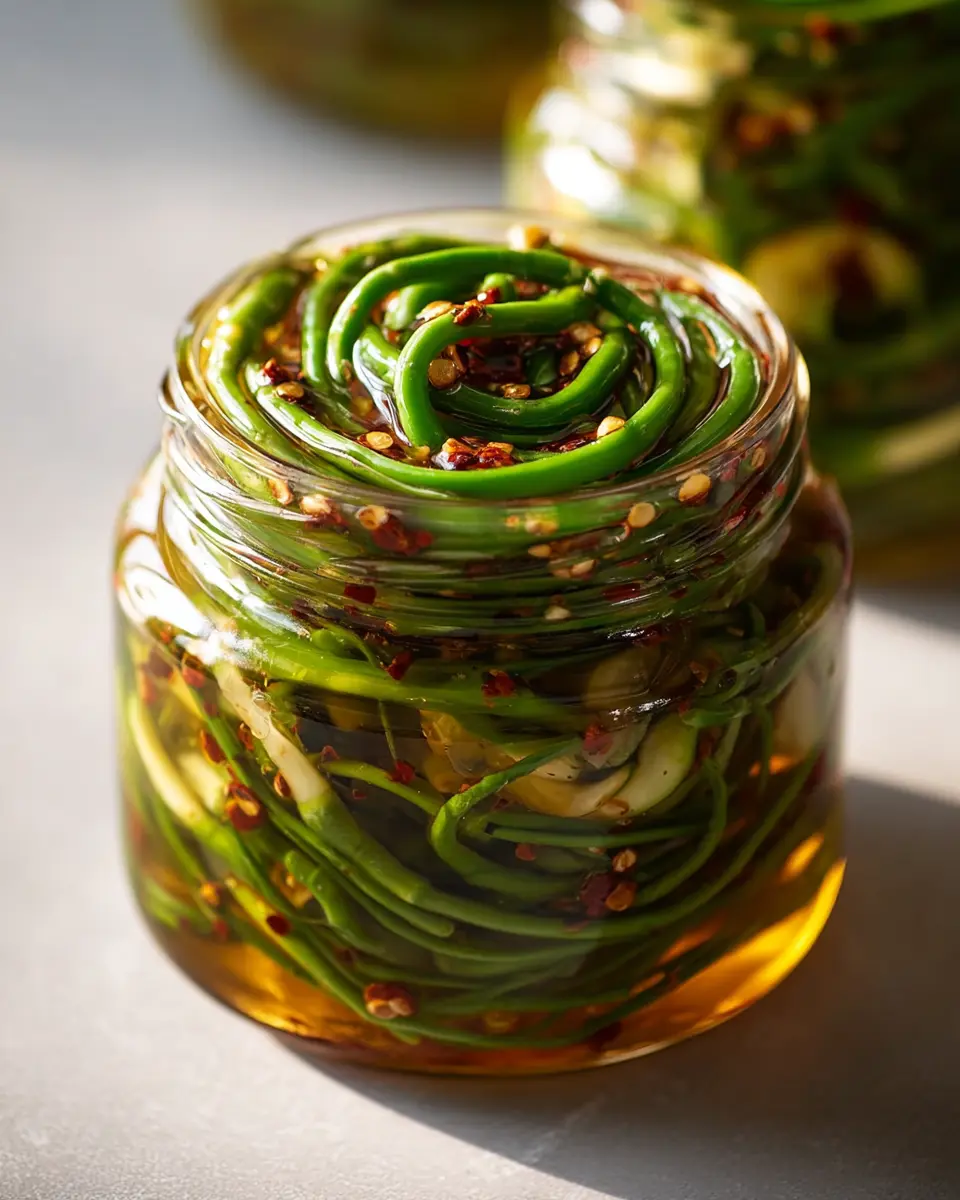
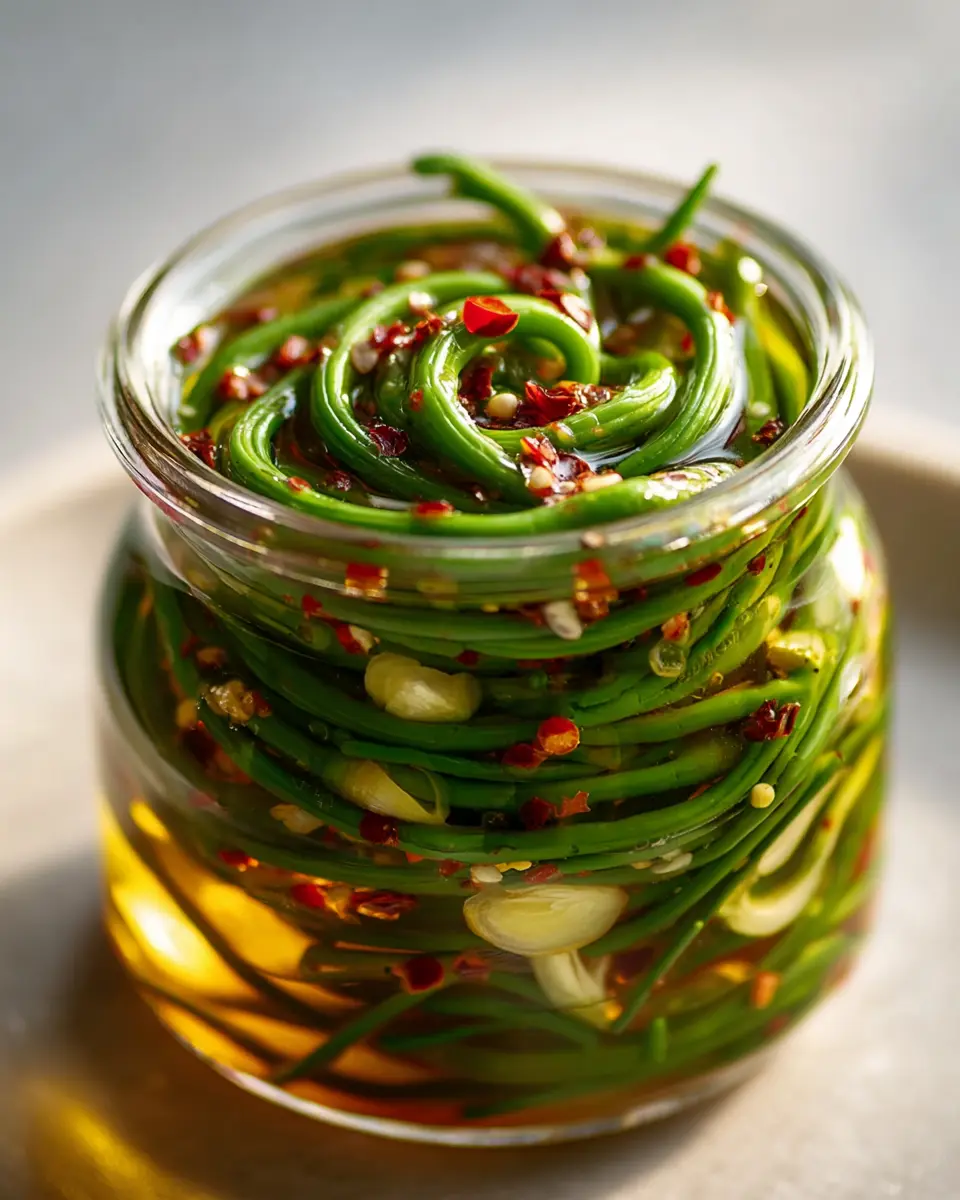
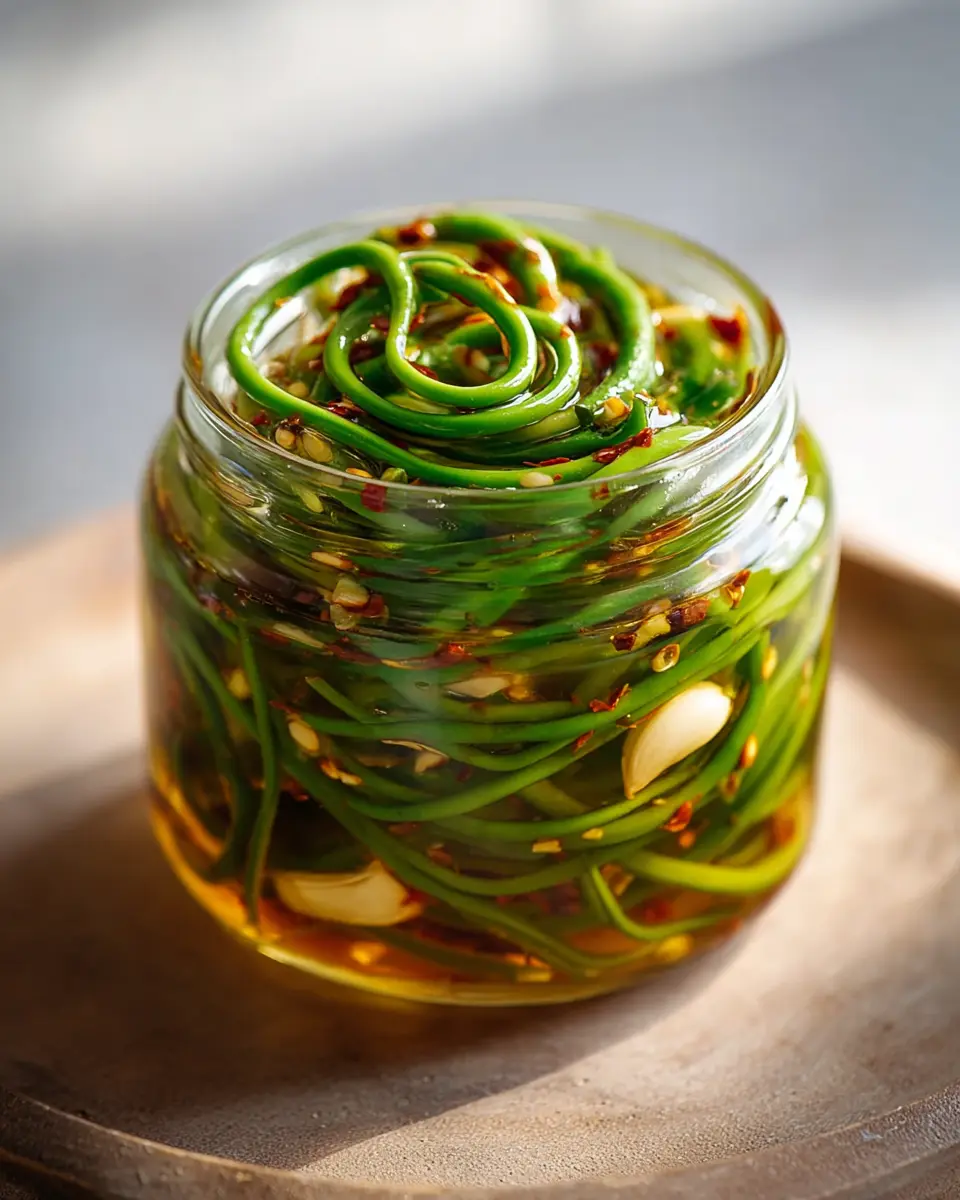
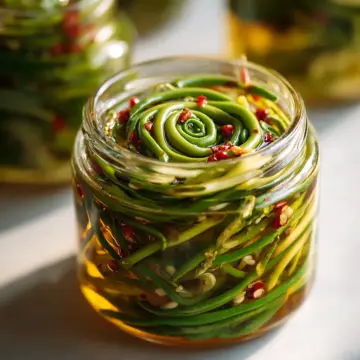
The first step is to prepare the garlic scapes. Trim off the tough ends, as they can be quite fibrous. Then, cut the scapes into 4-inch pieces. This size works perfectly for pickling, allowing for easy packing into jars and ensuring a delightful crunch when you bite into them. Plus, the vibrant green color will pop in your jars, making them as much a feast for the eyes as for the palate!
Make the Vinegar Brine
Next, let's whip up the vinegar brine! In a medium saucepan, combine 1 cup of distilled white vinegar with 1 cup of water, 2 tablespoons of kosher salt, and 2 tablespoons of granulated sugar. Heat over medium and stir until the salt and sugar dissolve. It’s simple, but the balance of vinegar and sugar will create that perfect tang that mingles beautifully with the garlic scapes. Curious about the benefits of pickling? Check out this informative article on pickling to get inspired!
Mix in the Spices
Once your brine is ready, it’s time to mix in the spices. Add the black peppercorns, mustard seeds, coriander seeds, and red chili flakes for that beloved kick! Toss in the smashed garlic cloves and the bay leaf, and let it simmer for an additional two minutes. This simmering step is crucial as it infuses the brine with those aromatic flavors, making your spicy pickled garlic scapes truly extraordinary.
Pack Jars and Pour the Brine
As the brine cools slightly, it’s time to pack your jars. Tightly pack the garlic scapes into two quart-sized jars, making sure to leave a bit of space at the top. Carefully pour the brine over the scapes, ensuring they are completely submerged for the best flavor infusion. If you opted for the turmeric for added color, now’s the moment to mix it in. Seal the jars with lids and allow them to cool to room temperature. Once cooled, refrigerate for at least 24 hours. The wait will be worth it, trust me!
With these easy steps, you’ll be well on your way to enjoying your own homemade spicy pickled garlic scapes. They’re perfect as a snack, a condiment, or a tangy addition to any meal. Happy pickling!
Variations on Spicy Pickled Garlic Scapes
Additional spice options
Want to customize your spicy pickled garlic scapes? Consider adding whole peppercorns, crushed red pepper, or even a dash of smoked paprika for a unique twist. For a zestier kick, try incorporating a few slices of fresh ginger or a sprinkle of chili powder.
Different flavor infusions
Explore flavor profiles beyond traditional recipes! Try adding lemon or lime zest for a citrusy brightness or a splash of soy sauce for an umami boost. Fresh herbs like dill or cilantro can also enhance the jar’s aroma and taste. Each variation adds a personal touch, making your pickled scapes truly one-of-a-kind. Ready to experiment? The possibilities are endless!
Cooking tips for Spicy Pickled Garlic Scapes
When preparing spicy pickled garlic scapes, keep these handy tips in mind for extra flavor and texture:
- Select Fresh Scapes: Choose bright green, firm scapes for the best crunch. Freshness equates to flavor!
- Adjust Spiciness: Tailor the heat to your liking by varying the amount of red chili flakes. Start small, and you can always add more over time.
- Experiment with Spices: Feel free to play with other spices like dill seeds or even crushed mustard. Personalize the recipe to suit your palate!
- Longer Pickling: For deeper flavors, let the scapes pickle for a few days before tasting. The longer they soak, the more intense the flavor develops!
For additional tips on pickling techniques, check out The National Center for Home Food Preservation for valuable insights.
Serving suggestions for Spicy Pickled Garlic Scapes
Spicy pickled garlic scapes are not just a tasty treat on their own; they can elevate a variety of dishes and snack time! Here are some delightful serving suggestions to consider:
- As a Snack: Enjoy them straight from the jar for a quick, crunchy bite. Pair with your favorite cheese or crackers for a gourmet platter.
- Topping for Sandwiches: Add spicy pickled garlic scapes to turkey bacon and avocado sandwiches for an extra layer of zing.
- Salads and Bowls: Toss them into grain bowls or salads for a flavorful twist, especially with fresh greens and a zesty dressing.
- Pasta Dishes: Chop them up and mix into pasta dishes as a unique garnish that adds crunch and spice.
For more serving ideas or inspiration, check out blogs like Serious Eats or Bon Appétit that offer a wealth of culinary creativity!
Time Details for Spicy Pickled Garlic Scapes
Preparation Time
Getting ready to make your spicy pickled garlic scapes takes just 10 minutes. You’ll be trimming and chopping those vibrant scapes while preparing the flavorful brine.
Pickling Time
After you pack the jars, let your pickles immerse in deliciousness for at least 24 hours in the refrigerator. This wait is essential to develop those robust flavors.
Total Time
In total, your culinary adventure will take about 30 minutes of hands-on time. But remember, the real magic happens as the garlic scapes soak up the brine over the next day!
Nutritional Information for Spicy Pickled Garlic Scapes
Calories Per Pickle
Each spicy pickled garlic scape packs a mere 15 calories. This makes them a guilt-free way to add a burst of flavor to your meals without worrying about calorie overload. Perfect for topping off a dish or snacking straight from the jar!
Sodium Content
These delicious pickles do come with a sodium punch—about 300 mg per serving. While sodium enhances flavor, it's always wise to enjoy these spicy pickled garlic scapes in moderation, especially if you're watching your salt intake. Pair them with fresh ingredients to balance your overall meal!
For more on the health benefits of garlic and pickling, check out this nutrition resource for detailed insights.
FAQs about Spicy Pickled Garlic Scapes
How long do pickled garlic scapes last?
Once you prepare your spicy pickled garlic scapes, they can last for up to 2 months in the refrigerator. It's important to keep them sealed in airtight jars to maintain their crunchiness and flavor. Just remember to check for any signs of spoilage before indulging—though they're usually consumed well before that!
Can I adjust the spice level?
Absolutely! The beauty of this recipe is its versatility. If you're sensitive to heat, consider reducing the amount of red chili flakes, or even omitting them initially. Conversely, if you love a fiery kick, feel free to double or even triple the chili flakes. Customize it to suit your taste!
What are the health benefits of garlic scapes?
Garlic scapes are rich in antioxidants and vitamins, promoting heart health and boosting your immune system. They also contain essential minerals like manganese and vitamin C, making them a nutritious addition to your diet. Not to mention, their unique flavor can elevate various dishes, making healthy eating all the more enjoyable. Explore more about the nutritional benefits of garlic scapes on Healthline.
Conclusion on Spicy Pickled Garlic Scapes
In just 30 minutes, you can transform your fresh garlic scapes into spicy pickled garlic scapes that elevate any dish. Perfect as a zesty snack or garnish, these pickles are both flavorful and nutritious. Don't hesitate to experiment with your spice levels for a custom kick!
Spicy Pickled Garlic Scapes with Vinegar Brine Recipe
Equipment
- medium saucepan
- Quart-sized jars
Ingredients
- 1 pound garlic scapes trimmed and cut into 4-inch pieces
- 1 cup distilled white vinegar
- 1 cup water
- 2 tablespoons kosher salt
- 2 tablespoons granulated sugar
- 1 teaspoon black peppercorns
- 1 teaspoon mustard seeds
- 1 teaspoon coriander seeds
- 1 teaspoon red chili flakes adjust to taste
- 4 cloves garlic peeled and smashed
- 1 bay leaf
- ½ teaspoon turmeric optional, for color
Instructions
- Start by preparing your garlic scapes. Trim off the tough ends and cut them into 4-inch pieces.
- In a medium saucepan, combine 1 cup of distilled white vinegar, 1 cup of water, 2 tablespoons of kosher salt, and 2 tablespoons of granulated sugar. Place the saucepan over medium heat and stir until the salt and sugar completely dissolve.
- Once the brine is ready, add the spices: 1 teaspoon of black peppercorns, 1 teaspoon of mustard seeds, 1 teaspoon of coriander seeds, and 1 teaspoon of red chili flakes. Toss in the smashed garlic cloves and 1 bay leaf. Simmer everything together for an additional 2 minutes to infuse the flavors.
- Remove the saucepan from the heat and let the brine cool for about 10 minutes.
- While the brine cools, prepare your jars. Pack the garlic scapes tightly into the jars, leaving a little space at the top for the brine.
- Once the brine has cooled slightly, carefully pour it over the garlic scapes in the jars, ensuring that they are fully submerged. If using optional turmeric, stir it into the brine before pouring.
- Seal the jars with lids and allow them to cool to room temperature. After they've cooled, refrigerate them for at least 24 hours before tasting.

Leave a Reply