
Introduction to Easy Sugar Cookie Glaze
When it comes to decorating sugar cookies, an easy sugar cookie glaze can be a game changer. Not only does it add a smooth, glossy finish, but it also enhances the overall look of your cookies, making them irresistible. Have you ever baked a batch of cookies that turned out beautifully, only to feel like something was missing? A glaze can elevate them to a whole new level, adding a delightful shine and allowing for creative expression through color.
Why glaze your sugar cookies, you may ask? Glazing not only makes your treats visually stunning but also adds a touch of sweetness, perfectly complementing the buttery flavor of the cookies. Plus, it creates an exciting opportunity for fun decorating! Think of the joy you feel when you see colorful, decorated cookies at a party or holiday gathering. According to experts, visually appealing desserts significantly enhance the overall experience of eating, which is why a glaze can be a lovely finishing touch.
So, gather your ingredients, embrace your creativity, and let’s dive into this easy sugar cookie glaze recipe that will surely impress your friends and family. For additional decorating ideas and techniques, check out resources from baking experts on Food Network and King Arthur Baking.
Ingredients for Easy Sugar Cookie Glaze
Creating the perfect easy sugar cookie glaze is all about having the right ingredients on hand. This simple yet effective glaze uses ingredients that are likely already in your pantry, making it both convenient and economical.
Here’s what you’ll need:
-
2 cups powdered sugar: This forms the base of your glaze, giving it that sweet flavor and smooth texture.
-
2–3 tablespoons milk: This liquid component is crucial for achieving the desired consistency. Adjust as needed for thicker or thinner glaze.
-
1 tablespoon light corn syrup: Adding this gives your glaze a beautiful gloss and helps it adhere to your cookies perfectly.
-
½ teaspoon vanilla extract: For that delightful hint of flavor that elevates your glaze.
-
1 pinch salt: Just a touch to balance out the sweetness and enhance the overall taste.
-
Gel food coloring (optional): If you want to add some color to your cookies, gel food coloring is the way to go. It won’t alter the consistency like liquid colorants can.
With these ingredients ready, you’re set to create a glaze that not only looks stunning but tastes amazing too! For more tips on cookie decorations, check out this guide on the importance of cookie glazes.
Step-by-step Preparation of Easy Sugar Cookie Glaze
Creating a delightful easy sugar cookie glaze is a simple yet rewarding process that can elevate your cookies from ordinary to extraordinary. Follow these easy steps, and get ready to impress with your beautifully glazed creations!
Gather your ingredients
Before diving into the glaze-making process, make sure to gather all the necessary ingredients. You will need:
- 2 cups of powdered sugar
- 2–3 tablespoons of milk
- 1 tablespoon of light corn syrup
- ½ teaspoon of vanilla extract
- A pinch of salt
- Optional: gel food coloring for a splash of color
Having everything ready at your fingertips makes the process smooth and enjoyable, just like professional bakers do.
Prepare your workspace
A clean, organized workspace is crucial. Clear your counter and lay out some parchment paper to catch any drips or spills. This will make cleanup a breeze and ensure that your easy sugar cookie glaze application goes off without a hitch.
Sift powdered sugar
In a mixing bowl, take the time to sift your powdered sugar. This step eliminates any lumps that could make your glaze less smooth. It’s a small effort for a big payoff, ensuring your glaze comes out perfectly silky.
Combine wet ingredients
In a separate bowl, combine the milk, corn syrup, vanilla extract, and salt. Make sure to measure accurately! These ingredients work together to create the glossy finish we all love on our cookies.
Whisk to perfection
Now it’s time to whisk! Add the sifted powdered sugar to your wet ingredients and mix until smooth. It’s important to whisk thoroughly, as you want to achieve a lump-free consistency that will spread beautifully on your cookies.
Adjust consistency as needed
After whisking, take a moment to check the consistency of your glaze. If it’s too thick, add a bit more milk; if it’s too thin, a little more powdered sugar will do the trick. Aim for a texture that allows the glaze to flow, but will set nicely when it dries.
Add color if desired
If you want to add some flair to your cookies, divide the glaze into bowls and introduce your gel food coloring. Start with just a drop at a time, mixing well until you reach your desired hue. The beauty of homemade glaze is that it’s completely customizable!
Test the glaze
Before applying the glaze to all your cookies, it's wise to test a small amount on one cookie. This allows you to check if the consistency and color are just right. Plus, it gives you an excuse to enjoy a little treat early!
Apply glaze to cookies
Using piping bags, squeeze bottles, or a spoon, apply your glaze creatively on each cookie. You can do simple drizzles or intricate designs—whatever suits your baking style.
Let them set
Finally, patience is key! Let your glazed cookies sit at room temperature until they're fully set. This can take anywhere from 30 minutes to a few hours, depending on the humidity in your kitchen. Once set, they’re ready for serving or storing.
With these steps, you’ll be well on your way to mastering the art of sugar cookie glazing that looks professional yet is easy to achieve. Enjoy your delightful baking adventures!
Variations on Sugar Cookie Glaze
Fun colors for festive occasions
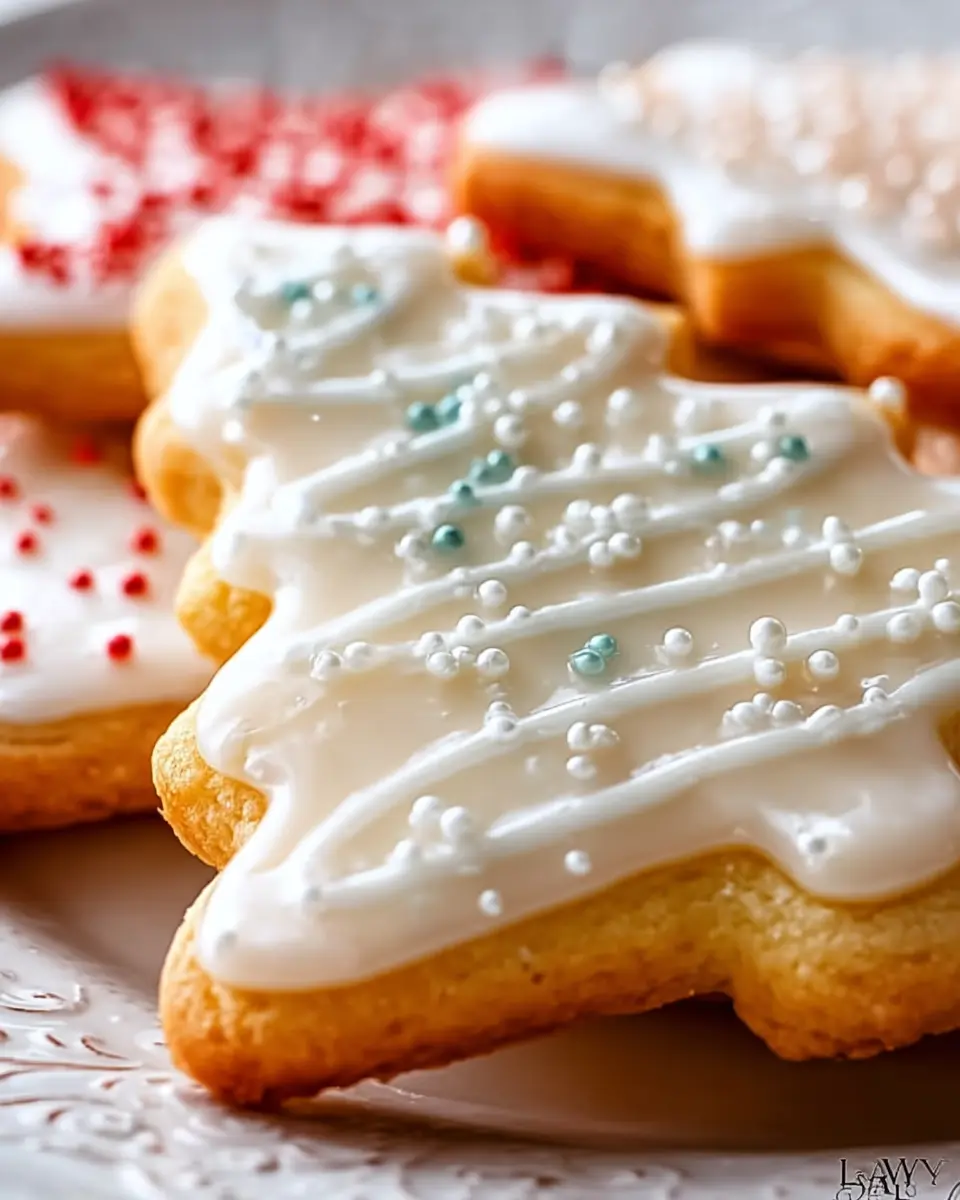
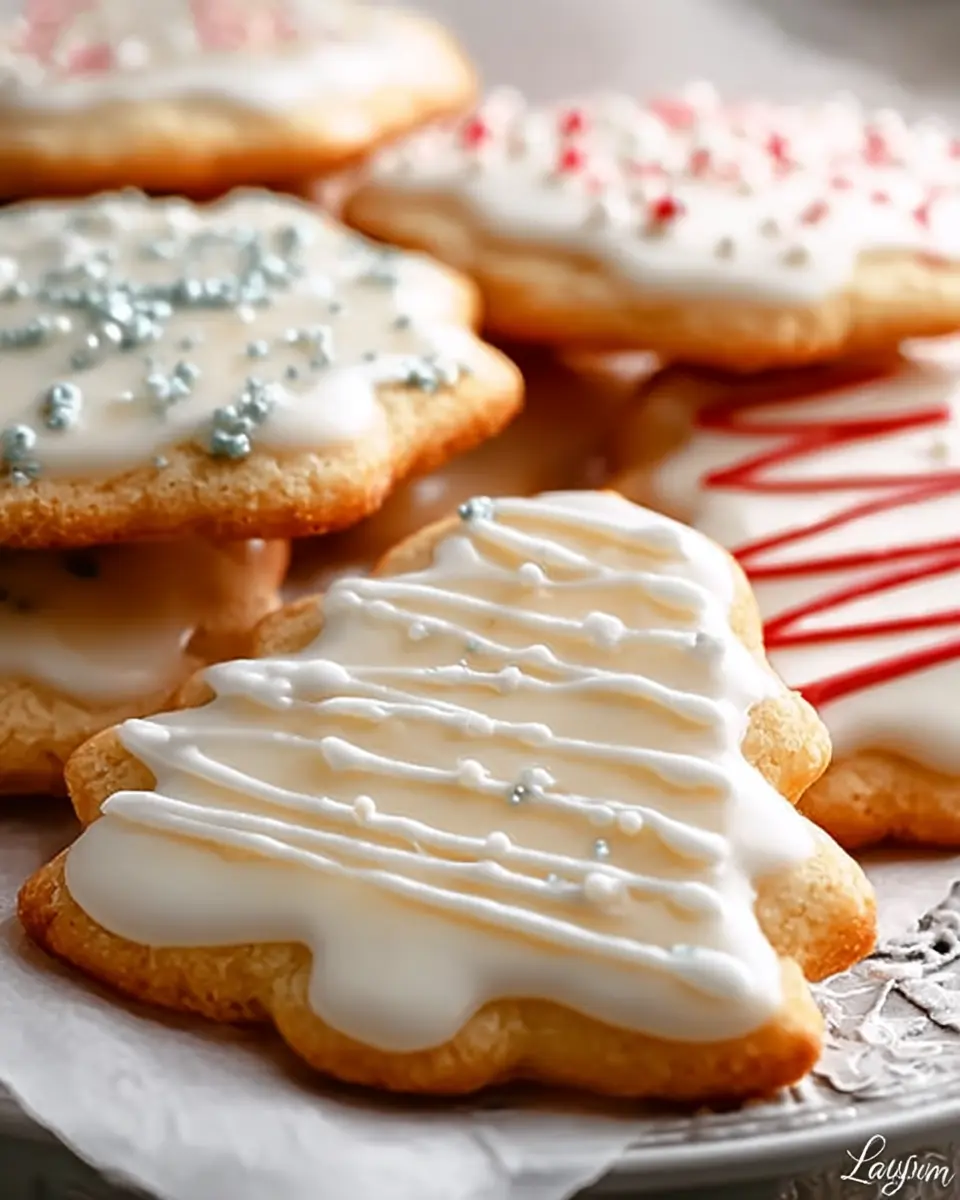
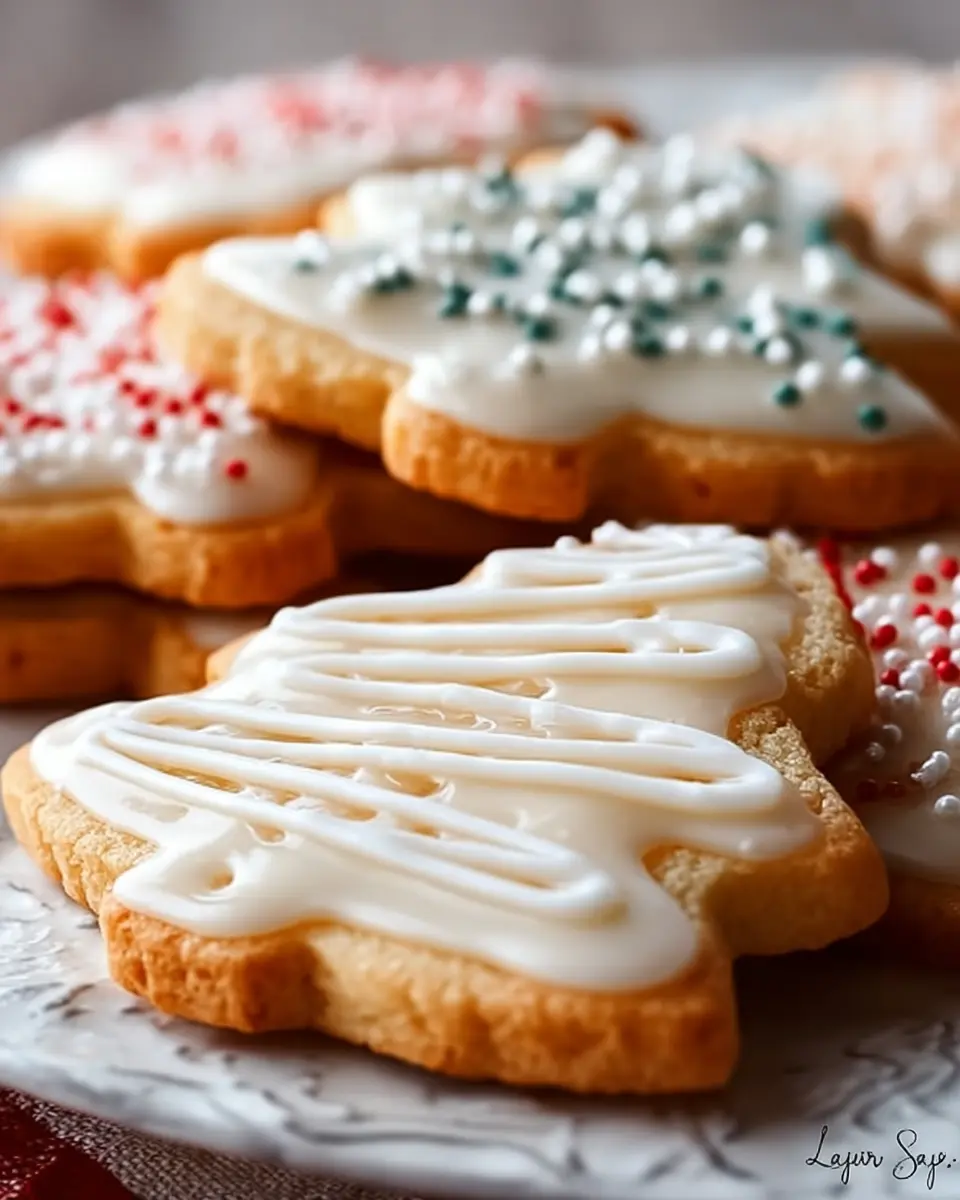
Transform your easy sugar cookie glaze into a vibrant masterpiece! Consider using gel food coloring to create festive shades for holidays or special events. Just a few drops can turn your glaze into stunning pastels for spring or bold hues for a birthday celebration. Mix and match colors for a delightful ombre effect or use white glaze as a canvas to add festive sprinkles. For a beautiful finish, consider pairing colors that complement your cookie designs, making them perfect for family gatherings or seasonal festivities.
Flavored glazes to elevate your treats
Why stop at just a glossy finish? Elevate your glaze by adding flavors! Try infusing your simple glaze with extracts such as almond, lemon, or peppermint. A dash of orange zest or some cocoa powder can give your glaze an enticing twist. These flavored glazes add a unique touch that leaves a lasting impression on your guests. Imagine the surprise on their faces when they taste your cookies, which look stunning and burst with delightful flavors! For more ideas on flavor combinations, check out this comprehensive guide for inspiration.
Cooking Tips and Notes for Sugar Cookie Glaze
Consistency Control Tips
Finding the right consistency for your easy sugar cookie glaze can make all the difference. If you want a thin glaze for smooth coverage, gradually add a bit more milk until you achieve your desired texture. For thicker, more defined lines, sprinkle in additional powdered sugar. Always remember, it’s easier to adjust by adding than by subtracting!
Storage Advice for Leftover Glaze
If you find yourself with leftover glaze, no worries! Simply store it in an airtight container at room temperature for up to two days. Just give it a good mix or a splash of milk when you’re ready to use it again; the glaze will be as good as new! For longer storage, you can refrigerate it, but be sure to let it come to room temperature before using.
Want more glaze perfection? Check out resources from Baking Basics for expert tips!
Serving Suggestions for Glazed Sugar Cookies
Creative Cookie Decorating Ideas
Elevate your glazed sugar cookies with delightful designs! Use different colors of your easy sugar cookie glaze to create fun patterns, or try the wet-on-wet technique for a marbled effect. For a seasonal touch, incorporate edible sprinkles or festive messages, like “Happy Holidays” or “Thank You” using a fine piping tip. Don't forget about your inner artist—cookies shaped like flowers, stars, or holiday symbols can really impress!
Perfect Beverage Pairings
These beautifully glazed cookies pair wonderfully with warm beverages. Try serving them alongside your favorite coffee for a cozy brunch, or enjoy them with a refreshing iced tea on a sunny afternoon. Hot chocolate is another fantastic match, especially when entertaining guests. The sweetness of the glaze complements the richness of these drinks perfectly!
For more fun decorating ideas, check out The Spruce Eats.
Time Breakdown for Making Easy Sugar Cookie Glaze
Preparation Time
You'll need just 10 minutes to whip up this quick and simple easy sugar cookie glaze. It’s all about mixing a few ingredients, making it perfect for a busy baking day.
Setting Time
After glazing your cookies, let them sit at room temperature until fully set. This can take about an hour depending on your environment, so set a reminder to keep an eye on them!
Total Time
All in, you're looking at around 70 minutes from start to finish, with the bulk of that time dedicated to allowing the glaze to harden. Your beautiful cookies will be ready to impress in no time!
For more baking tips and tricks, check out thejoyofbaking.com or bakerella.com for further inspiration!
Nutritional Facts for Easy Sugar Cookie Glaze
When indulging in the delightful world of baking, understanding the nutritional values of your creations is key! Here’s a quick look at the nutritional facts for our easy sugar cookie glaze:
- Calories per cookie: Each cookie with glaze contains about 90 calories.
- Sugar content: You’ll find 20 grams of sugar in each cookie, making it a sweet treat perfect for special occasions.
For further information on sugar content in recipes, check this resource. Balancing these sweet indulgences with a nutritious diet can help you enjoy your baking without any guilt!
FAQs about Sugar Cookie Glaze
Can I substitute ingredients?
Absolutely! If you don't have light corn syrup, you can use honey or maple syrup for similar sweetness. For a dairy-free glaze, swap milk for almond or soy milk. Remember that these changes might slightly alter the flavor and texture, but they can still yield a delicious result!
How long does the glaze last?
Once made, your easy sugar cookie glaze can be stored in an airtight container at room temperature for up to two weeks. If you store it in the fridge, it can last a bit longer. Just give it a good stir before using, as it may thicken or separate.
What to do if my glaze is too runny?
If your glaze is thinner than you'd like, don’t worry! Simply mix in a bit more powdered sugar until you reach your desired consistency. Start with a tablespoon at a time to avoid making it too thick. Testing on a cookie will help you get it just right!
Conclusion on Easy Sugar Cookie Glaze
The easy sugar cookie glaze is a game-changer for transforming your baked treats! With just a few ingredients and minimal time, you can create a beautiful, glossy finish that will impress family and friends. Don't hesitate to experiment with colors and designs—each batch can be uniquely yours! By using this glaze, your sugar cookies will not only taste fantastic but also look like professional masterpieces. Happy baking!

Easy Sugar Cookie Glaze
Equipment
- mixing bowl
- whisk
- piping bags
- squeeze bottles
- spoon
- parchment paper
Ingredients
- 2 cups powdered sugar
- 2–3 tablespoons milk
- 1 tablespoon light corn syrup Use for glossy finish
- ½ teaspoon vanilla extract
- 1 pinch salt
- gel food coloring optional
Instructions
- Ensure cookies are completely cooled and prepare your workspace with parchment paper.
- Sift powdered sugar into a mixing bowl to remove lumps.
- Add milk, corn syrup, vanilla extract, and salt to the sugar.
- Whisk until smooth and lump-free.
- Adjust consistency by adding more milk for thinning or powdered sugar for thickening.
- Divide glaze into separate bowls if using multiple colors.
- Add gel food coloring gradually and mix well.
- Test glaze on one cookie to check consistency and drying.
- Apply glaze using piping bags, squeeze bottles, or a spoon.
- Let cookies sit at room temperature until fully set before serving or storing.


Leave a Reply