
Introduction to Red Velvet Cake
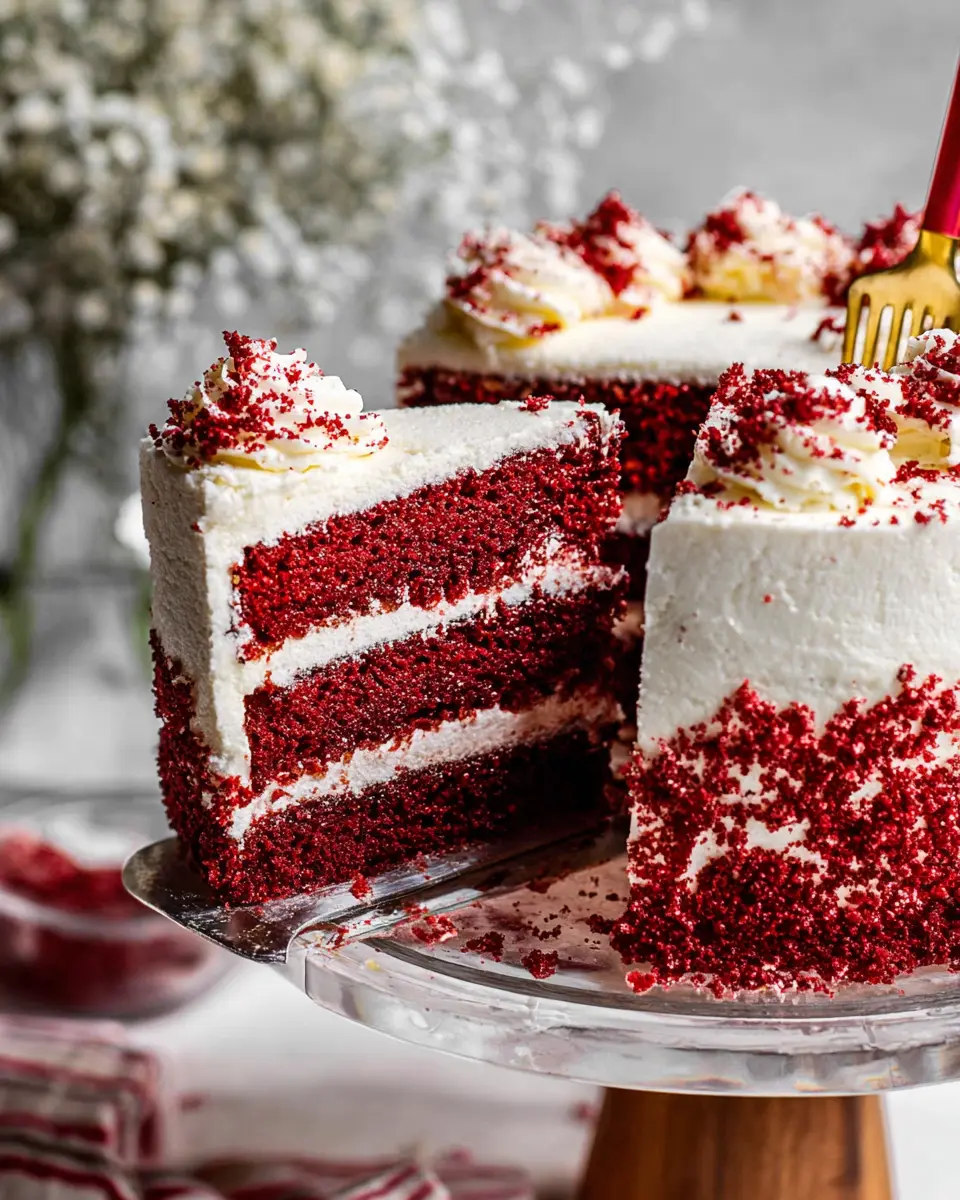
Red velvet cake is not just a dessert; it's a culinary masterpiece that blends flavor, texture, and visual appeal in one delightful package. Originating from the Southern United States, this iconic cake weaves its enchanting story through layers of moist, buttery cake tinted a deep red, often complemented by the rich tang of cream cheese frosting.
Why Red Velvet Cake is a Must-Try for Every Home Baker?
If you’re looking to impress at your next gathering or simply want to indulge in something truly special, making red velvet cake is a fantastic choice. Here’s why every home baker should give it a shot:
-
Incredible Flavor: The cake’s delicate tang is achieved with the addition of buttermilk, vinegar, and cocoa, creating a subtly chocolatey experience that’s unlike any other.
-
Eye-Catching Presentation: The vibrant red color of the cake makes it a stunning centerpiece for any occasion, prompting gasps of delight from your guests.
-
Versatile Base: You can customize your red velvet cake with different frostings and fillings—why not experiment with a luscious cream cheese frosting or even a rich chocolate ganache?
Not convinced yet? The history behind red velvet cake is just as rich as its flavor. To dive deeper, check out this article on Taste Atlas that explores its origins and adaptations. So, are you ready to bake one of the most beloved cakes in America? Let’s get started!
Ingredients for Red Velvet Cake
Essential ingredients for the cake
To whip up a stunning red velvet cake, you’ll need a variety of ingredients that contribute to its unique flavor and color. Here’s what you’ll gather for the cake itself:
- 3 cups all-purpose flour
- 2 tablespoons cocoa powder
- 1 teaspoon salt
- 1 teaspoon baking soda
- 4 whole eggs, at room temperature
- 1 ½ cups milk
- 1 cup vegetable oil
- 2 tablespoons white vinegar
- 2 teaspoons vanilla extract
- 1 ¾ cups granulated sugar
- 1 tablespoon red gel food coloring
These ingredients create a beautifully moist and fluffy cake with a hint of chocolate and that classic striking red hue!
Ingredients needed for the frosting
A delicious cake deserves an equally impressive frosting. For the cream cheese frosting, you’ll need:
- 16 ounces cream cheese, at room temperature
- 1 cup unsalted butter, at room temperature
- ¼ cup heavy whipping cream
- 2 teaspoons vanilla extract
- ½ teaspoon salt
- 4 cups powdered sugar
This rich frosting not only complements the cake perfectly but also adds a creamy texture that elevates each bite. For tips on frosting techniques, you might find this frosting guide helpful!
Preparing Red Velvet Cake
Creating a stunning red velvet cake at home may seem daunting, but with a bit of organization and care, you'll impress your friends and family with this classic treat! Let’s walk through this delightful process together.
Gather and prep your ingredients
Before you dive into mixing, it's essential to gather all your ingredients. This step not only helps streamline the baking process but also ensures you won't scramble for anything in the middle of mixing. Here’s what you need for your red velvet cake:
- 3 cups all-purpose flour
- 2 tablespoons cocoa powder
- 1 teaspoon salt
- 1 teaspoon baking soda
- 4 whole eggs (room temperature)
- 1 ½ cups milk
- 1 cup vegetable oil
- 2 tablespoons white vinegar
- 2 teaspoons vanilla extract
- 1 ¾ cups granulated sugar
- 1 tablespoon red gel food coloring
Additionally, line your cake pans with parchment paper and preheat your oven to 350°F to get everything ready for baking!
Create the cake batter
Now, let’s mix things up! Start by sifting together the flour, cocoa powder, salt, and baking soda in a large bowl—this aeration is key to a light cake. In a separate bowl, combine your wet ingredients: whisk together the eggs, milk, oil, vinegar, and vanilla extract until well blended. Gradually add the granulated sugar and mix until dissolved. Then, slowly add your sifted dry ingredients, taking care not to overmix. Trust me, a light hand is crucial for that airy texture. Finally, mix in the red gel food coloring to achieve that luscious hue.
Bake the layers to perfection
Divide the batter evenly among your prepared cake pans. Bake for 25 to 28 minutes, switching the pan positions halfway through to ensure even baking. You’ll know they’re ready when a toothpick inserted in the center comes out clean.
Cool the cake layers properly
After baking, allow your cakes to cool in the pans for about 10 minutes. This helps them release easily without sticking. Once slightly cooled, flip them out onto a wire rack to cool completely. Cooling is an important step; if you frost the cake while it’s warm, you risk melting your frosting and ruining your gorgeous creation!
Whip up the cream cheese frosting
While your cake layers are cooling, it’s time to prepare the frosting. In a large bowl or using a stand mixer, beat together room-temperature cream cheese and butter until blended and smooth. Add heavy whipping cream, vanilla extract, and salt, mixing just until incorporated. Gradually add your powdered sugar, mixing one cup at a time, and adjust the consistency as needed with additional cream or sugar until it's just right.
Assemble and frost your beautiful cake
Once your cake layers and frosting are ready, it’s assembly time! Start by trimming any domed tops from your cooled cakes to ensure they stack evenly. Spread a bit of frosting on your cake stand to keep the base layer in place, then add a layer of frosting between each cake. After stacking, apply a thin layer of frosting to the sides and top of the cake for a "crumb coat." Once set, go back for a thicker layer if desired. Pipe decorations or use cake scraps for a fun finishing touch!
Baking a red velvet cake is not just about following steps; it's about enjoying the process and celebrating the results. Happy baking!
Variations on Red Velvet Cake
Red Velvet Cupcakes
If you love the classic red velvet cake, consider whipping up some delightful red velvet cupcakes! These mini versions offer the same rich flavor and stunning color but in a portable size—perfect for parties or a cozy night in. Simply follow the cake recipe, filling cupcake liners about two-thirds full, and bake for 18-20 minutes. Top with cream cheese frosting for that signature taste in every bite. A fun variation is to add chocolate chips or sprinkles for extra flavor and flair!
Gluten-Free Red Velvet Cake
For those with dietary restrictions, a gluten-free red velvet cake can be just as delicious! Substitute all-purpose flour with a high-quality gluten-free flour blend. Ensure your other ingredients are also gluten-free to avoid cross-contamination. The rest of the recipe remains the same, so you can enjoy all the classic flavors without the gluten. It’s a fantastic way to share this crowd-pleaser with everyone at the table! Want to know more about gluten-free baking? Check out America's Test Kitchen for expert tips.
These variations not only keep the delightful essence of red velvet cake but also cater to different tastes and preferences. Your guests will surely appreciate the options!
Baking Tips for Perfect Red Velvet Cake
Avoiding Common Mistakes
To ensure your red velvet cake turns out perfectly, avoid overmixing the batter. This can lead to a dense cake, which we definitely don’t want. Additionally, always measure flour accurately—too much can affect the texture. Finally, let your layers cool completely before frosting to prevent a melty mess!
Achieving the Ideal Texture
The secret to a light, fluffy red velvet cake lies in the balance of wet and dry ingredients. Use room-temperature eggs and milk for easy emulsification. Incorporating the wet and dry ingredients in stages can help achieve that dreamy texture. And don’t forget to rotate your cake pans halfway through baking for even cooking!
For more insights, check out King Arthur Baking for baking tips from the pros.
Serving Suggestions for Red Velvet Cake
Pairing with Beverages
When it comes to enjoying your red velvet cake, think beyond the usual coffee or tea. A refreshing glass of iced hibiscus tea offers a nice contrast to the cake’s sweetness, while cold brew coffee enhances its rich chocolate notes. Alternatively, consider serving it with homemade lemonade—its tangy freshness beautifully balances the creaminess of the frosting. Discover more about beverage pairings here.
Creative Presentation Ideas
Make your red velvet cake a showstopper at any gathering! Consider using cake stands in complementary colors to accentuate the vibrant red hue. Add fresh berries or edible flowers on top for a pop of color and flavor. You could even create a fun “slice of happiness” display by arranging individual servings on decorative plates with a dollop of whipped cream or a drizzle of chocolate sauce. Let your creativity shine!
Time Breakdown for Red Velvet Cake
Preparation Time
Getting ready to whip up this delicious red velvet cake takes about 25 minutes. This includes gathering your ingredients and mixing the batter. Pro tip: measure everything beforehand to make the process smoother!
Baking Time
Once prepped, pop your cake pans into the oven for 25 to 28 minutes. This is when the magic happens! Make sure to rotate the pans halfway for even baking.
Cooling and Serving Time
After baking, let your red velvet cake cool in the pans for 10 minutes, then transfer them to a wire rack for at least 3 hours until completely cool. Chilling your cake ensures the frosting doesn’t melt—plus, it’s a good time to enjoy a coffee while fantasizing about your dessert!
For a deeper dive into baking techniques, check out sources like Serious Eats for expert advice on cake-making!
Nutritional Facts for Red Velvet Cake
Calories per slice
Each delightful slice of red velvet cake packs about 473 calories, making it a moderately indulgent treat. Perfect for a special occasion or a sweet pick-me-up, balancing this treat with healthier choices throughout the day can help you enjoy it guilt-free.
Key nutrients
Beyond the delicious taste, this cake offers some noteworthy nutrients:
- Carbohydrates: 65g
- Protein: 6g
- Fat: 22g (including 13g of saturated fat)
- Sugar: 48g
- Cholesterol: 98mg
This rich dessert brings joy but is best enjoyed in moderation. For more details on healthy dessert choices, check out articles from sources like The Academy of Nutrition and Dietetics. By pairing this treat with fresh fruit or a balanced meal, you can satisfy your sweet tooth while maintaining a nutritious diet!
FAQs about Red Velvet Cake
Can I use a different food coloring?
Absolutely! While traditional recipes often call for red gel food coloring, you can experiment with other colors like blue or green to give your red velvet cake a fun twist. Just be mindful that the color might affect the overall look and flavor. For a more natural option, consider beet juice, but adjust the quantity to achieve your desired shade.
How to store Red Velvet Cake properly?
To keep your red velvet cake fresh and delicious, store it in a domed cake plate or an airtight container. It’s best kept in the refrigerator, where it will stay good for about three days. If you need longer storage, you can freeze the cake layers; just ensure they’re well wrapped in plastic wrap and aluminum foil.
What’s the origin of Red Velvet Cake?
The red velvet cake has a rich history dating back to the 1920s and is often linked to the southern United States. Its signature color comes from the reaction between cocoa powder and acidic ingredients like vinegar and buttermilk. It's said to have gained popularity when it was featured in the 1989 movie "Steel Magnolias," making it a favorite for many celebrations.
For more insights, check out this source on the history of cakes!
Conclusion on Red Velvet Cake
Why You Should Bake It Today!
Red velvet cake is a stunning dessert that promises both beauty and flavor. Whether it’s a special occasion or simply a treat for yourself, this fluffy, chocolate-infused cake paired with luscious cream cheese frosting is sure to impress. Bake it today and enjoy a slice of joy!
Red Velvet Cake
Equipment
- cake pans
- Mixing Bowls
- Stand Mixer
- serrated knife
- Bench Scraper
Ingredients
For the Cake
- 3 cups all-purpose flour
- 2 tablespoons cocoa powder
- 1 teaspoon salt
- 1 teaspoon baking soda
- 4 whole eggs at room temperature
- 1.5 cups milk
- 1 cup vegetable oil
- 2 tablespoons white vinegar
- 2 teaspoons vanilla extract
- 1.75 cups granulated sugar
- 1 tablespoon red gel food coloring
For the Frosting
- 16 ounces cream cheese at room temperature
- 1 cup unsalted butter at room temperature
- 0.25 cup heavy whipping cream
- 2 teaspoons vanilla extract
- 0.5 teaspoon salt
- 4 cups powdered sugar
Instructions
Prepare the Cake
- Preheat the oven to 350°F. Grease 3 cake pans (8-inch), line with parchment paper, and set aside.
- Sift together the flour, cocoa powder, salt, and baking soda in a large bowl. Set aside.
- In another large bowl, whisk the eggs, milk, vegetable oil, white vinegar, and vanilla extract until thoroughly combined.
- Add sugar to the wet ingredients and whisk until the sugar has dissolved.
- Add in the sifted dry ingredients. Slowly whisk or fold until the mixture is just combined. Be careful not to overmix, as this could lead to a dense and gummy cake.
- Add the food coloring and mix until the batter is an even, dark red color.
- Divide the batter evenly into the three cake pans.
- Bake for 25 to 28 minutes, rotating the pans halfway through the bake time.
- Remove the cake from the oven and cool in the pans for 10 minutes.
- Carefully flip the cakes out of the pans onto a wire cooling rack. Allow to cool completely.
Prepare the Frosting
- In a bowl or stand mixer, beat the cream cheese, butter, and heavy whipping cream until smooth.
- Add in the vanilla and salt and mix until incorporated.
- Mix in the powdered sugar one cup at a time at a slow speed.
- If the frosting is too thick, add in 1 tablespoon of heavy cream at a time. If it is too thin, add in 2 to 4 tablespoons of powdered sugar at a time.
- Cover and set aside until ready to use.
Assemble the Cake
- Using a serrated knife or a cake leveling tool, trim and level the tops of the cakes. You can reserve the scraps of cake to crumble and decorate the cake with after frosting.
- Add a bit of icing to the cake stand to help the cake stick to the stand and not move.
- Spread an even layer of cream cheese frosting between each layer of cake.
- Spread a thin coat of frosting on the sides and top of the cake. Smooth it using a bench scraper. Add another layer of frosting, if desired.
- Optionally, pipe a frosting border along the edge of the cake.
- Cut and serve.
Leave a Reply