
Introduction to Japanese Milk Bread (Shokupan)
What makes Japanese Milk Bread so irresistible?
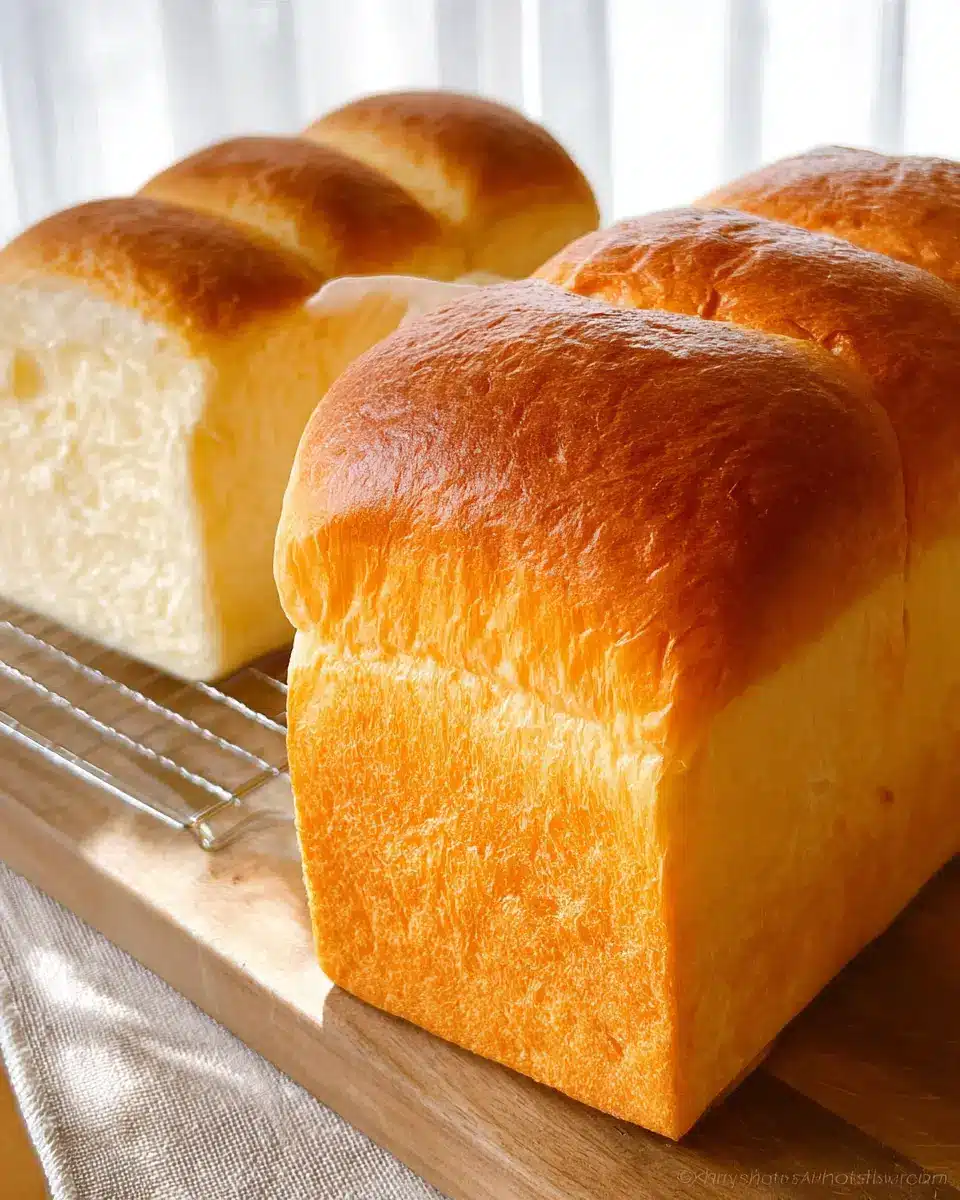
Japanese Milk Bread, or shokupan, is not just another loaf of bread; it’s a culinary experience bursting with flavor and texture. What makes it so captivating? It starts with its ultra-soft, pillowy texture that practically melts in your mouth, thanks to the unique tangzhong method, which involves cooking a portion of the flour and water to create a gel-like mixture that locks in moisture.
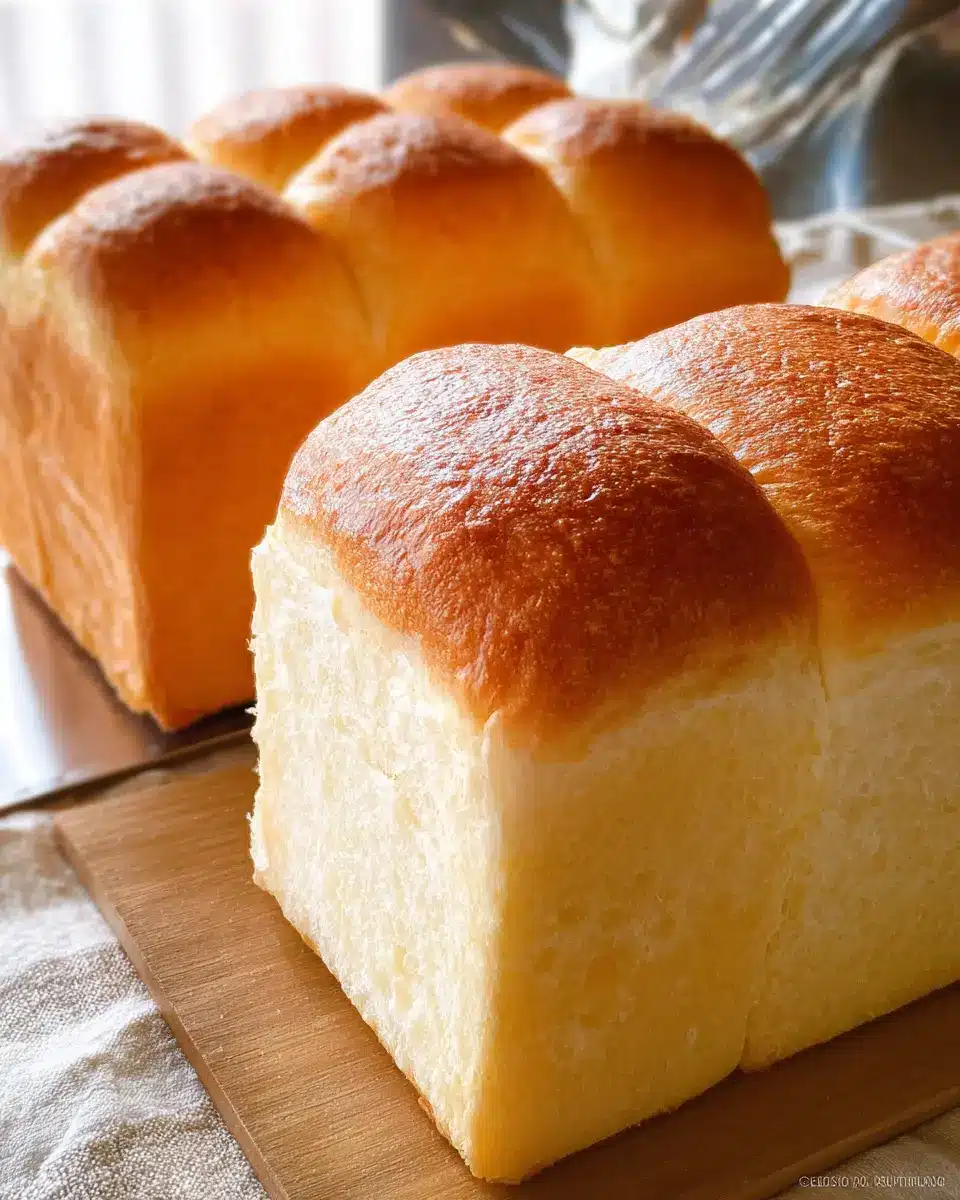
This fabulous bread has a subtly sweet, milky flavor that comes from ingredients like skim milk powder and honey, making it the perfect companion for breakfast toast or savory sandwiches. Imagine starting your day with a slice topped with creamy butter and sweet jam or crafting a delicious sandwich with turkey bacon and fresh greens.
But the appeal of shokupan goes beyond just taste; it’s a staple in Japanese households that brings comfort and nostalgia. Many people reminisce about the scent of freshly baked shokupan wafting through the air as a sign of home.
Ready to bring this delicious tradition into your kitchen? Follow along in my detailed recipe to discover the magic of Japanese Milk Bread! For more tips and insights, check out expert resources like the Bread Baker’s Guild of America.
Ingredients for Japanese Milk Bread
Key ingredients for a fluffy shokupan
To create the perfect Japanese Milk Bread (shokupan), you'll need a few key ingredients that contribute to its signature fluffiness and milky sweetness. Here’s what to gather:
- Warm water: Acts as the base for activating yeast.
- Sugar and honey: Provide sweetness and help with browning.
- Kosher salt: Enhances flavor and controls yeast activity.
- Instant yeast: Essential for that airy rise.
- Bread flour: High gluten content ensures a soft and chewy texture.
- Skim milk powder: Builds richness and contributes to a tender crumb.
- Unsalted butter: Adds moisture and flavor, making the bread decadent.
Alternative ingredients for special diets
If you have specific dietary needs, there are great alternatives! For a vegan version of shokupan, swap out:
- Butter for coconut oil or a vegan butter like Miyoko’s.
- Skim milk powder with coconut milk powder for a non-dairy option.
These adjustments ensure everyone can enjoy this delightful bread! Check out Bob’s Red Mill or your local health food store for these specialized ingredients.
Preparing Japanese Milk Bread (Shokupan)
Making Japanese milk bread shokupan is a delightful and rewarding process that results in the softest, most delicious bread you'll ever taste. Whether you plan to enjoy it with some creamy butter or use it for a scrumptious sandwich, this bread will impress your taste buds. Let's dive into the steps to make your own loaf of shokupan!
Gather Your Equipment and Ingredients
Before you begin, it's crucial to have all your tools and ingredients at the ready. You'll want a KitchenAid stand mixer with a dough hook, a digital kitchen scale, and a Japanese loaf pan—either rectangular or square depending on your preferred shape. Prepare the following ingredients:
- Warm water
- Sugar
- Kosher salt
- Honey
- Instant yeast
- Bread flour
- Skim milk powder
- Unsalted butter
Measuring with a kitchen scale ensures that you get the ratios just right—this is essential for a perfect shokupan!
Prepare the Dough
Start by mixing your warm water, sugar, salt, and honey in a bowl. This combination activates the yeast, which is key to making your dough rise beautifully. Once you see bubbles forming after about 10 minutes, it’s time to combine this with the flour mixture, made from bread flour and skim milk powder.
Knead the Dough to Perfection
Using a stand mixer, begin kneading the dough. It's critical to start slow and gradually increase the speed. The dough should transition from sticky to smooth and elastic over several minutes of kneading. This step develops gluten, which is what gives shokupan its signature texture.
Perform the Windowpane Test
Once kneading is complete, try the windowpane test: stretch a small piece of dough. If it’s thin enough to let light through without tearing, you've got it! If not, knead it a few more minutes. This step is essential for achieving that light, airy structure.
Allow for the First Rise
Place your dough in a lightly oiled bowl and cover it. Let it rise in a warm spot until it triples in size, around 40 minutes to an hour, depending on the temperature in your kitchen. Make sure to check it frequently; patience here pays off!
Shape the Dough for the Loaves
After the first rise, gently deflate the dough and divide it into equal portions. Shape each piece into a tight ball. This is important for creating tension, which will help the loaves rise correctly.
Final Proofing of the Shaped Loaves
Time for the final proof! Place your shaped dough in the greased loaf pan and cover it. Let it rise again until it reaches about 80-90% of the pan's height. The warmth will help them rise beautifully.
Bake the Shokupan to Golden Perfection
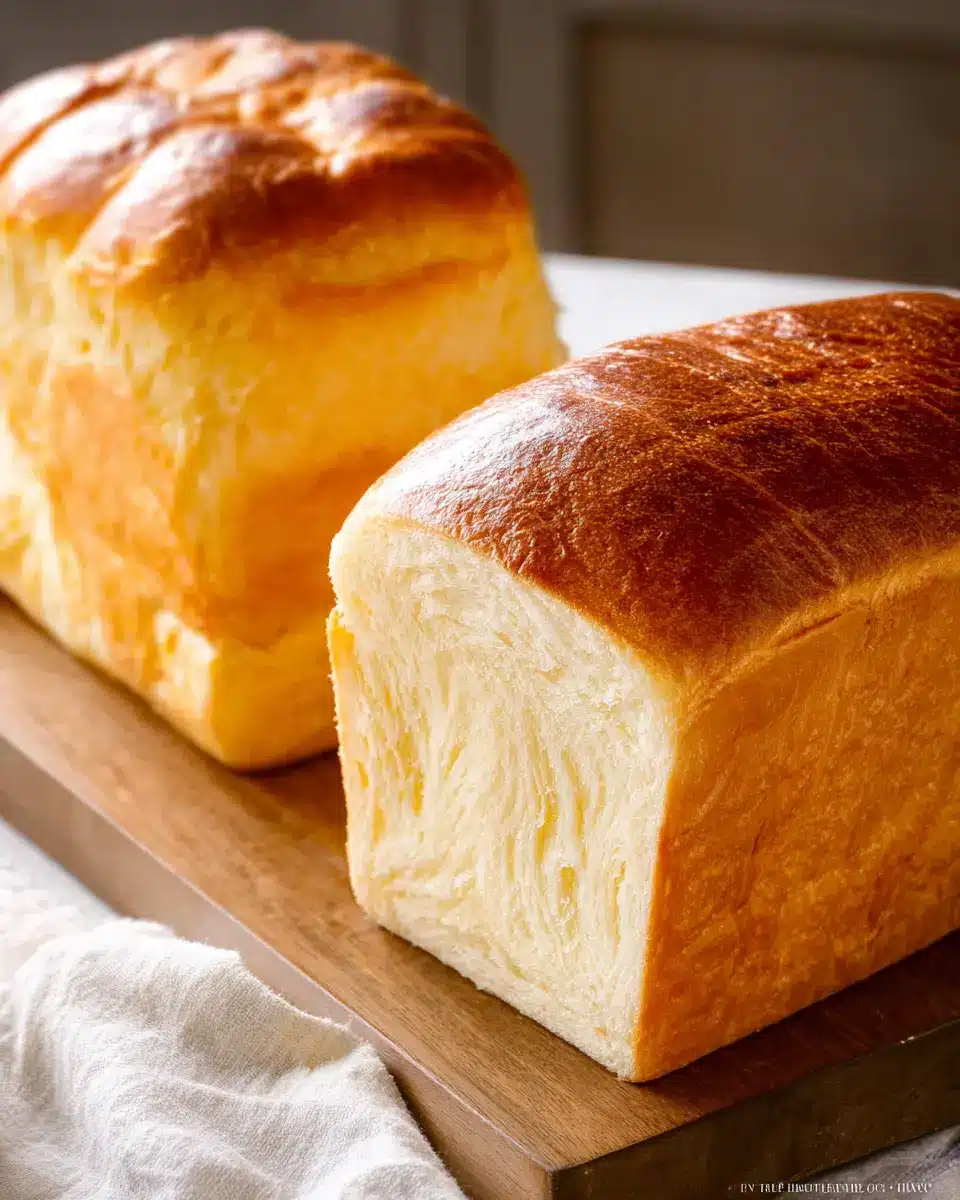
Once you've preheated your oven, it’s time to bake! Depending on the shape of your loaf, adjust the temperature accordingly. Bake the shokupan until it turns a golden brown, then let it cool completely before slicing. Nothing beats the smell of freshly baked bread wafting through your kitchen!
This journey of making Japanese milk bread shokupan is not just about the end result—it's an experience filled with sensory delights. Take the time to savor each step, and soon you'll have a heavenly loaf to enjoy!
Variations of Japanese Milk Bread
Sweet Shokupan Variations
Japanese milk bread shokupan isn’t just about delightful texture; it's a canvas for creativity! Try adding a touch of sweetness with chocolate chips, matcha powder, or even cinnamon. You can elevate it further by incorporating ingredients like sweet red bean paste or custard into the dough for a unique twist. Whether as a breakfast treat or a dessert, these variations make every bite a delicious experience worth savoring.
Savory Shokupan Options
If savory is more your style, look no further! Incorporate herbs like rosemary or thyme into the dough for an aromatic loaf. For a heartier flavor, consider folding in ingredients such as grated cheese or Turkey Bacon. This versatile bread can be transformed into perfect sandwich bread for Chicken Ham or freshly sliced roast beef, making it a delightful addition to any meal. Embrace your culinary creativity!
Cooking Tips and Notes for Japanese Milk Bread (Shokupan)
Troubleshooting Common Baking Issues
Baking Japanese milk bread shokupan can sometimes lead to unexpected results. If your bread is overly dense, it might be under-kneaded. If it’s too crumbly, guess what? Over-kneading could be the culprit! Make sure you’re checking the dough texture during the kneading process and performing the windowpane test for optimal gluten development. Also, if the dough isn’t rising well, check your yeast freshness and ensure your proofing environment is warm enough; a simple method is placing a bowl of hot water in the oven to create steam.
Tips for Achieving the Best Texture
- Use high-quality ingredients. Good bread starts with good flour. Opt for bread flour for its higher protein content, which contributes to a better rise.
- Pay attention to temperature. Water should be warm (not hot) to activate the yeast effectively. Aim for around 104°F (40°C).
- Kneading is key. Knead until the dough is smooth and elastic—this typically takes about 10 minutes with a stand mixer. Remember, you want that pillowy softness!
- Oil your dough. Lightly greasing your bowl before the first rise can help prevent sticking, making it easier to manage later.
By adhering to these tips, you’ll be well on your way to enjoying the delightful textures of homemade shokupan. Happy baking! For more expert advice, check out The Kitchn’s baking techniques or King Arthur Baking.
Serving Suggestions for Japanese Milk Bread (Shokupan)
Delicious Toppings and Spreads
The soft and fluffy Japanese milk bread (shokupan) is a fantastic canvas for various toppings. Try spreading some creamy butter and a drizzle of honey for a quick snack. For a savory option, consider creating a delicious turkey bacon sandwich—layer your turkey bacon with fresh lettuce and ripe tomatoes on a slice of shokupan. You can even pair your bread with delicious Japanese sweet red bean paste for a delightful breakfast treat.
Creative Uses in Meals and Snacks
Looking for meal inspiration? Use shokupan to make fluffy French toast by soaking it in a mixture of eggs and milk, then pan-frying until golden. Another fun use is crafting delightful mini sandwiches—think chicken ham, cucumber, and a hint of mayo—all packed perfectly for lunch. Not just versatile for meals, shokupan also serves wonderfully as a warm side with your favorite soups, adding a comforting touch to any dish.
Time Breakdown for Japanese Milk Bread
Preparation Time
The Japanese Milk Bread (Shokupan) takes about 1 hour to prepare. This includes gathering ingredients, measuring, and mixing everything together. It’s a great time to put on some music or a podcast while you whisk that lovely dough together!
Rising Time
Allow for 2 hours and 5 minutes of rising time. This is crucial for achieving that signature fluffy texture. Make sure to check on the dough during this time to enjoy the magical transformation as it expands!
Baking Time
Baking takes about 30 minutes. The best part? That delectable aroma will fill your kitchen as it cooks!
Total Time
From start to finish, it takes approximately 3 hours and 35 minutes. While it may seem like a lengthy process, the moments are well worth the wait when you slice into that perfect loaf of shokupan!
Nutritional Facts for Japanese Milk Bread
Calories per serving
A single serving of Japanese Milk Bread (shokupan) contains approximately 1645 calories. This number may seem high, but when you consider the light, fluffy texture and the quality of ingredients used, you'll find each slice is a delicious treat worth savoring.
Carbohydrates and protein content
This delightful bread packs a hefty 295g of carbohydrates and about 52g of protein. The bread is ideal for sustaining energy levels throughout your day, making it an excellent option for breakfast or as a post-workout meal.
How to enjoy it healthily
To enjoy your shokupan in a healthier way, consider these options:
- Top with fresh fruits: Spread a layer of almond butter and add banana slices for a nutritious and satisfying breakfast.
- Make a sandwich: Use whole ingredients like turkey bacon, lettuce, and tomato for a balanced meal.
- Opt for lighter spreads: Instead of butter, try Greek yogurt or cottage cheese with a sprinkle of honey.
With these simple tweaks, your Japanese Milk Bread will not only taste fantastic but also contribute positively to your overall diet! For tips on more healthy toppings, check out this guide.
FAQs about Japanese Milk Bread (Shokupan)
How can I store my shokupan?
To keep your shokupan fresh, allow it to cool completely on a wire rack. If you plan to enjoy it within 1 to 2 days, store the whole loaf in a bag or an airtight container. For longer preservation, slice and freeze the bread; it remains tasty for about a month. Just remember to ensure it's well-wrapped to prevent freezer burn!
What can I use if I don’t have a loaf pan?
If you don’t have a Japanese loaf pan handy, fear not! You can opt for any standard loaf pan. Alternatively, using an oven-safe dish that allows some room for the bread to expand is a great hack. Just make sure it can withstand the baking temperature and you’ll still get that lovely shokupan texture.
Can I freeze Japanese Milk Bread?
Absolutely! Freezing is one of the best ways to preserve your shokupan. Once cooled, slice it and wrap individual pieces tightly in plastic wrap. This way, you can easily grab a slice at a time. When you’re ready to indulge, simply thaw it at room temperature or pop it in the toaster for a warm treat!
Conclusion on Japanese Milk Bread
Why You Should Try Making Shokupan Today!
If you’ve been searching for a delightful addition to your breakfast menu, Japanese Milk Bread Shokupan is a must-try! With its unbeatable softness and milky flavor, this bread elevates any sandwich or toast. Plus, making it yourself adds a special touch to your meals. Roll up your sleeves and experience this baking adventure today!

Japanese Milk Bread (Shokupan) (Video) 食パン 3
Equipment
- KitchenAid Stand Mixer (Artisan Series)
- Rectangular Japanese Loaf Pan
- Square Japanese Loaf Pan
- Digital Kitchen Scale
- large bowl
- Dough scraper
- Dredge shaker
- rolling pin
- Mister
- Bread Loaf Bags
- Plastic wrap
- Kitchen towel
- wire rack
- small baking dishes
- dough hook attachment for stand mixer
- Pastry Brush
- paper towels
Ingredients
For 1 Rectangular Shokupan Loaf
- 250 g warm water 104ºF, 40ºC
- 20 g sugar
- 7 g Diamond Crystal kosher salt
- 10 g honey
- 7 g instant yeast Fleischmann’s® bread machine yeast
- 350 g bread flour King Arthur
- 20 g skim milk powder or nonfat dry milk powder Bob’s Red Mill
- 25 g unsalted butter at room temperature
For Greasing
- 0.5 teaspoon neutral oil for the bowl
- 10 g unsalted butter at room temperature for the pan
For 1 Square Shokupan Loaf
- 167 g warm water
- 14 g sugar
- 4.5 g Diamond Crystal kosher salt
- 7 g honey
- 4.7 g instant yeast
- 235 g bread flour
- 14 g skim milk powder or nonfat dry milk powder
- 17 g unsalted butter
Instructions
Preparation
- Gather all ingredients and measure precisely with a digital kitchen scale.
- Combine warm water, sugar, salt, and honey in a large bowl.
- Add yeast to the mixture and set aside for 10 minutes.
- Combine bread flour and dry milk powder in the stand mixer bowl.
- Pour the yeast mixture into the well of the flour mixture.
Kneading
- Set up the stand mixer with a dough hook attachment.
- Knead dough on Speed 2 for 2 minutes.
- Increase speed to 4 and knead for 4 minutes.
- Add butter and knead on Speed 2 for 2 minutes and then on Speed 4 for 4 minutes.
- Knead on Speed 6 for 3 minutes.
Proofing and Baking
- Cover dough and let it rise in a warm environment for 40 minutes.
- Preheat the oven to 425ºF (220ºC) for baking.
- Bake for 25-30 minutes for flat-topped, or 30 minutes for round-topped shokupan.
- Let the shokupan cool completely on a wire rack.


Leave a Reply