
Introduction to Homemade Cream Puffs
The allure of homemade cream puffs
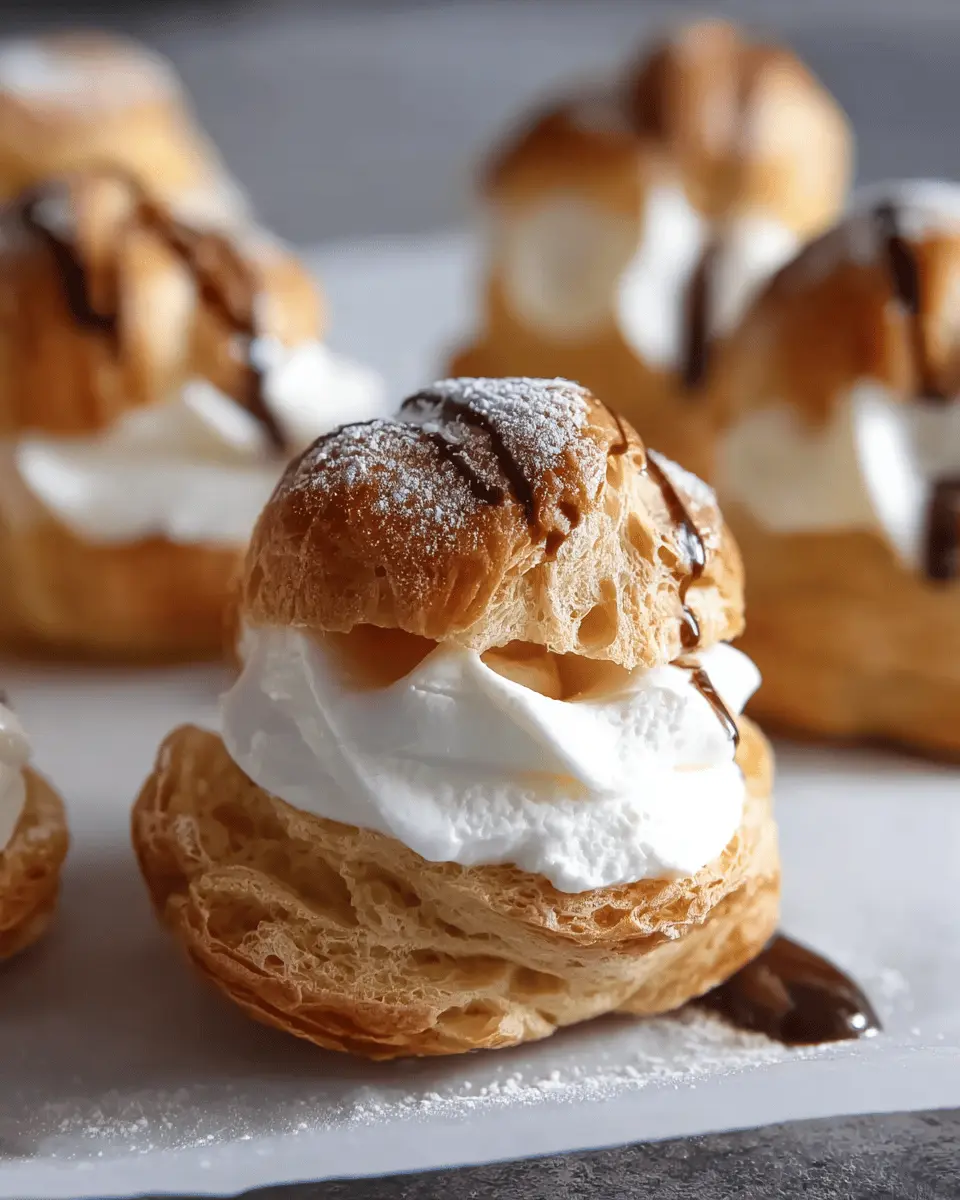
If you've ever wandered past a bakery and been entranced by the delicate sweetness of homemade cream puffs, you're not alone. These airy, golden delights are a staple of French patisserie, celebrated for their light texture and the jubilant filling of whipped cream that lies within. The best part? You can create these charming desserts right in your own kitchen!
Imagine the satisfaction of making the choux pastry from scratch—a simple combination of water, butter, flour, and eggs—then watching it puff up in the oven, transforming into beautifully hollow shells. It's both an art and a science, and there's something undeniably rewarding about it. While many might shy away from attempting these delightful pastries at home, the journey is well worth the effort.
For some delightful inspiration, check out this choux pastry history to see how these treats have charmed sweet-toothed enthusiasts throughout the ages. Fluffy and versatile, cream puffs can be filled with a variety of fillings—think pastry cream or custard—making them a fantastic dessert option for any occasion. So roll up your sleeves and get ready to impress your friends and family with your very own homemade cream puffs!
Ingredients for Homemade Cream Puffs
Creating delightful homemade cream puffs begins with knowing the right ingredients to use. Here’s what you’ll need:
Essential Ingredients for Pâte à Choux
To craft the crispy shells that make cream puffs so irresistible, gather these essentials:
- 1 ¼ cup water
- ½ cup unsalted butter
- 1 teaspoon granulated sugar
- ½ teaspoon kosher salt
- 1 cup all-purpose flour
- 4 large eggs
These ingredients come together to form a dough that puffs beautifully when baked, creating light and airy pastry.
Whipped Cream Ingredients
For the luscious filling that completes your cream puffs, you'll need:
- 2 cups heavy whipping cream
- ½ cup powdered or granulated sugar
- 1 teaspoon pure vanilla extract
Whipping these together creates a rich and airy filling that perfectly complements the crispy shells!
Special Equipment Needed
To make the most of your homemade cream puffs, having the right tools is essential:
- Stand mixer: For effortless whipping of cream and mixing dough.
- Pastry bag & tips: A plain and star tip help you fill and decorate the puffs beautifully.
- Cooling rack: This is crucial for letting the pastry shells cool properly before filling.
Grabbing these ingredients and tools will set you up for success in making delightful cream puffs! For more tips, check out resources from The Spruce Eats.
Step-by-Step Preparation of Homemade Cream Puffs
Making homemade cream puffs is a delightful experience that impresses your friends and family while letting your creative culinary skills shine. Trust me; it's not as intimidating as it may seem! Let's dive into the step-by-step preparation process, ensuring you have a delicious outcome.
Preheat the Oven
First, set your oven to 425°F (218ºC) and position the racks in the upper-middle and lower-middle slots. This temperature is crucial for creating those perfectly airy and crispy pastry shells. Don’t forget to line two baking sheets with parchment paper, so your cream puffs don’t stick!
Make the Dough
Now, let’s make the pâte à choux. In a heavy-bottomed saucepan, combine 1 cup of water, sugar, salt, and your butter (8 slices). Bring this mixture to a boil over medium-high heat, stirring until the butter melts completely. Once boiling, turn off the heat and add the flour all at once. Stir vigorously to combine. The dough should clump together and leave a film on the saucepan after about 4-5 minutes of stirring over medium heat.
Cool the Dough
Transfer the hot dough into a mixing bowl fitted with a paddle attachment. Mix on low speed until it cools to about 130°F (54ºC), which takes about 2-3 minutes. Cooling is essential, as you don’t want to scramble your eggs in the next step!
Incorporate the Eggs
With the stand mixer still running on medium-low speed, add the eggs one at a time. Mix well after each addition. After adding three eggs, check if the dough pulls away from the bowl’s sides in thick threads. If it’s too thick, add the fourth egg. The goal is for a shiny, firm dough that holds its shape when piped.
Pipe the Dough onto the Sheet
Get a pastry bag ready with a large plain tip. Lightly grease the inside of the bag to help it from getting too sticky (a handy tip!). Pipe 2-inch rounds onto the prepared baking sheets, keeping them at least 2 inches apart to allow for expansion.
Brush with Egg Wash
Whisk together an egg and a tablespoon of water in a small bowl to create your egg wash. Carefully brush this mixture over the tops and sides of each piped dough ball, giving them a beautiful golden finish as they bake.
Bake the Cream Puffs
Place your sheet pans in the oven, swapping them halfway through baking to ensure even cooking. Bake for the first 10 minutes at 425°F, then reduce to 375°F (191ºC) for 10 more minutes, and continue baking at lower temperatures until they become light and crispy. This gradual baking creates the perfect puffing effect.
Prepare the Whipped Cream
While the puffs are baking, it’s time to whip up some delicious cream! In a stand mixer with a whisk attachment, combine heavy cream, powdered sugar, and vanilla extract. Whip on medium-low speed until frothy, then increase to medium-high until stiff peaks form (about 2 minutes). This is where your cream becomes fluffy and perfect for filling!
Fill the Cream Puffs
Once your cream puffs have cooled completely, slice them in half horizontally. Use a pastry bag fitted with a star tip to fill each bottom with luscious whipped cream. Place the tops back on, giving them a delightful crown.
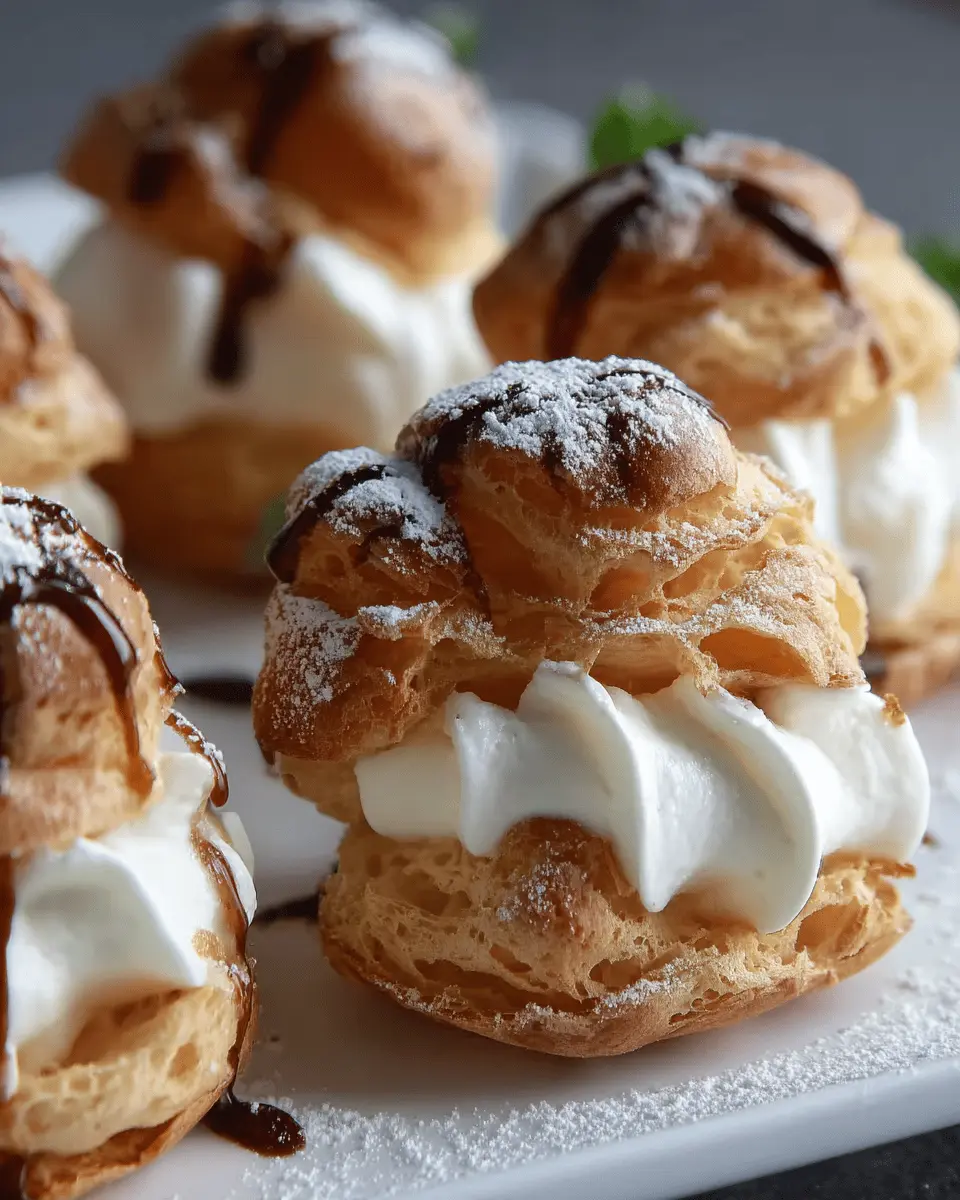
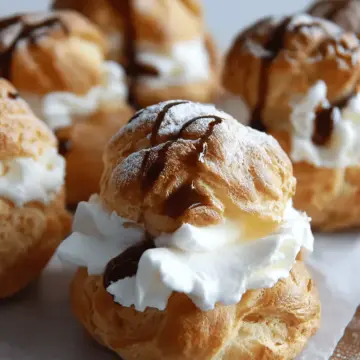
Dust with Powdered Sugar
To finish off your gorgeous homemade cream puffs, sprinkle powdered sugar on top. This adds a touch of elegance and sweetness to your creation.
Now, it’s time to enjoy these delightful treats immediately or store them in the fridge if you aren’t serving them right away. Homemade cream puffs are truly a joy to make and share—happy baking!
Variations on Homemade Cream Puffs
Chocolate Cream Puffs
Indulge your chocolate cravings with these delightful chocolate cream puffs! Simply fold melted chocolate into the whipped cream filling for a rich and decadent twist. You can even drizzle some chocolate sauce over the puffs before serving for an extra treat. They pair wonderfully with a cup of coffee or espresso, making them the perfect dessert for a cozy evening.
Fruit-Filled Cream Puffs
If you're looking to brighten up your dessert table, consider fruit-filled homemade cream puffs! Add fresh berries, such as strawberries or raspberries, to your whipped cream for a burst of flavor and color. Alternatively, try a fruit puree—like mango or passion fruit—for a tropical flair. The freshness of the fruit complements the creaminess, creating a refreshing treat that’s simply irresistible!
For more delicious dessert ideas, check out resources like Food Network or Bon Appétit for inspiration!
Baking Tips and Notes for Homemade Cream Puffs
Common mistakes to avoid
Making homemade cream puffs can be tricky, so steer clear of these pitfalls:
- Under-mixing the dough: Ensure the flour is fully incorporated to achieve the right texture.
- Opening the oven door: This can cause the shells to collapse. Trust the baking process; resist the urge to peek!
- Using too much flour: Measure correctly to keep the pastry light and airy.
For detailed flour measuring techniques, check out resources on the King Arthur Baking website.
How to store unfilled shells
Once baked, let them cool completely. You can store the unfilled cream puff shells at room temperature in an airtight container for up to 5 days. If you want to extend their life, freeze them for up to a month. When ready to use, reheat in the oven at 300°F (149°C) for 5-10 minutes to regain their crispness. This way, your desserts will stay fresh and delightful!

Serving Suggestions for Homemade Cream Puffs
Pairing with Coffee or Tea
Take your homemade cream puffs to the next level by pairing them with your favorite beverage. A rich, creamy cappuccino or a light herbal tea can enhance the delicate flavors of the cream filling. Imagine the delightful balance of a buttery cream puff with a bold espresso—it's a match made in heaven! For a festive touch, consider serving them with flavored teas like Earl Grey or chai, which complement the sweetness beautifully.
Creative Plating Ideas
Presentation is key when serving homemade cream puffs. Consider arranging them on a vibrant platter, dusting with powdered sugar for an elegant finish. You might also want to create a dessert tower: stack the cream puffs vertically instead of in rows for an eye-catching display. You can even drizzle some chocolate sauce or berry compote around the base to invite guests in. Get creative—these little pastries deserve to shine!
Time Breakdown for Homemade Cream Puffs
Preparation time
Creating homemade cream puffs involves about 30 minutes of preparation. This includes gathering your ingredients, making the dough, and getting everything ready for baking.
Baking time
Once your cream puff dough is piped, you'll be looking at around 1 hour and 15 minutes of baking time. This gradual temperature approach ensures that your puffs are perfectly cooked.
Total time
In total, you’re looking at approximately 1 hour and 45 minutes from start to finish. Just think, in under two hours, you can serve up some impressive French desserts at your next gathering or cozy night in! Want to enhance your cooking experience? Check out this guide on mastering choux pastry!
Nutritional Facts for Homemade Cream Puffs
Calories per cream puff
Each delightful homemade cream puff contains approximately 116 calories, making them a sweet treat that is indulgent yet manageable within your daily caloric intake.
Nutritional breakdown
Delving into the nutritional profile, these cream puffs provide:
- Carbohydrates: 10g
- Protein: 3g
- Fat: 7g
- Saturated Fat: 4g
- Cholesterol: 66mg
- Sodium: 94mg
- Potassium: 28mg
- Fiber: 1g
- Sugar: 4g
For more detailed insights on nutrition, feel free to visit sources like Healthline or USDA Nutrition that offer extensive dietary information. Enjoy every homemade cream puff knowing you’ve made a delicious and relatively balanced choice!
FAQs about Homemade Cream Puffs
Can I make cream puffs ahead of time?
Yes, you can! For the best results, prepare the pâte à choux ahead of time and store the unfilled shells in an airtight container at room temperature for up to 5 days or freeze them for up to a month. Just be sure to fill them with whipped cream when you're ready to serve for the freshest taste!
How do I know when they're done baking?
Look for a beautiful golden-brown color! To check for doneness, gently break open one of the pastries; it should feel light and be dry inside. Remember, keep that oven door closed during the baking process to maintain the heat!
What can I substitute in the recipe?
You can swap whole milk for water in the egg wash for a richer finish, or, if you're feeling adventurous, use a mix of heavy cream and your favorite flavor extract for the whipped cream filling. Dive into more tips at King Arthur Baking.
Enjoy creating these delightful homemade cream puffs!
Conclusion on Homemade Cream Puffs
Creating homemade cream puffs is a delightful journey worth taking. The satisfaction of crafting airy choux pastry and sweet whipped cream is unmatched, making these treats perfect for impressing guests or enjoying a moment of indulgence. Share them with friends, and watch as smiles abound!
Why Making Cream Puffs Is Worth It
Making your own cream puffs allows you to customize each aspect, from the richness of the filling to the shape of the pastry. Here are a few reasons why investing your time in this classic French dessert is so gratifying:
-
Freshness: There’s nothing quite like the taste of homemade pastry. When you bake from scratch, you control every ingredient, ensuring that each bite is as fresh and flavorful as possible.
-
Customization: You can experiment with flavors! Want a touch of lemon zest in your cream or maybe a drizzle of chocolate on top? The possibilities are endless, giving you the freedom to express your culinary creativity.
-
Impressive Presentation: These elegant puffs are sure to impress any dinner guest. Their golden-brown exterior and fluffy cream interior make for an irresistible addition to any dessert table.
-
Skill Building: Each step in the process enhances your baking skills, from mastering pâte à choux to whipping cream to perfection. You'll learn techniques that will serve you well in future baking endeavors.
When you bite into that pillowy cream puff, you’ll realize it’s not just about the dessert; it's about the love and effort that went into creating it. So why not gather some friends, have a baking day, and enjoy the fruits of your labor?
Homemade Cream Puffs: Easy, Delightful Treats for Everyone
Equipment
- Stand Mixer
- Cooling Rack
- Pastry Bag
- Plain Pastry Tip
- Star Pastry Tip
Ingredients
Pâte à Choux
- 1 ¼ cup water divided
- 1 teaspoon granulated sugar
- ½ teaspoon kosher salt
- ½ cup unsalted butter cut into 8 slices
- 1 cup all-purpose flour spoon and leveled
- 4 large eggs
- ¼ cup powdered sugar for dusting
Egg Wash
- 1 large egg
- 1 tablespoon water or milk
Whipped Cream (4 cups)
- 2 cups heavy whipping cream or heavy cream
- ½ cup powdered sugar or granulated sugar
- 1 teaspoon pure vanilla extract
Instructions
Preparation
- Preheat the Oven: Set the oven racks to upper-middle and lower-middle positions. Preheat to 425°F (218ºC). Line two sheet pans with parchment paper and set them aside.
- Make the Dough: In a large heavy-bottomed saucepan, add 1 cup of water, sugar, salt, and butter. Bring to a boil over medium-high heat and stir until the butter fully melts, about 2 minutes.
- Cool the Dough: Transfer the dough to a bowl of a stand mixer fitted with a paddle. Slowly stir on low speed (setting 2) to cool to 130°F (54ºC) or just below, about 2 to 3 minutes.
- Add the Eggs in Stages: Add eggs one at a time, mixing on medium-low speed (setting 4) until incorporated.
- Piping the Dough: Pipe onto the sheet pan, creating a 2-inch circular ball, at least 2 inches apart.
- Brush on Egg Wash: Whisk together one egg and 1 tablespoon of water. Brush the tops and sides of each dough ball.
- Gradual Baking Process: Bake for approximately 60 to 70 minutes, rotating the trays as specified.
- Make the Whipped Cream: In a stand mixer, whip together heavy cream, powdered sugar, and vanilla until stiff peaks form.
- Piping the Cream: Cut the shells in half and evenly pipe the whipped cream into the bottoms.
- Top with Sugar: Sprinkle powdered sugar on top of each cream puff.
Leave a Reply