
Introduction to Mini Cheesecakes
Mini cheesecakes are the perfect dessert for almost any occasion, from gatherings with friends to festive holidays. But why choose mini cheesecakes over traditional full-sized versions? For starters, their bite-sized nature makes them easy to serve and even easier to eat! Guests can enjoy one (or two!) without feeling overly indulgent, allowing them to sample different flavors without the commitment of a large slice.
Another significant advantage is their versatility. Mini cheesecakes can be customized with various toppings, including fresh fruits like strawberries or blueberries, or even decadent chocolate ganache. With so many options, you can cater to diverse flavor preferences, satisfying everyone at your event. Plus, they’re an excellent choice for meal prep or make-ahead desserts, as they store well in the fridge or even the freezer, making them an ideal dessert to have on hand.
Taking the plunge into mini cheesecakes opens up a world of creative possibilities. If you want to dive deeper into the art of cheesecake, this comprehensive guide offers even more insights and tips. So, grab your mixing bowl and get ready to impress your friends and family with these delightful treats!
Ingredients for Mini Cheesecakes
Creating delicious mini cheesecakes doesn’t have to be complicated! With the right ingredients, you’ll be well on your way to impressing your friends and family at your next gathering. Let's dive into what you'll need!
Essential ingredients for the perfect mini cheesecake
To make the ideal base for your mini cheesecakes, gather these key players:
- Vanilla wafers: These provide a sweet and crunchy crust.
- Cream cheese: The star of the show, it offers that rich and creamy texture.
- White sugar: A little sweetness balances the creaminess.
- Eggs: Essential for binding, they give your cheesecakes stability.
- Vanilla extract: This adds a warm, comforting flavor.
Optional ingredients for unique flavors
Want to switch things up? Consider these optional ingredients to customize your mini cheesecakes:
- Lemon zest: A touch of citrus brightness can elevate the flavor.
- Chocolate wafers: Swap for a dessert that satisfies chocolate cravings.
- Nuts: Crushed almonds or pecans can add an extra crunch to your crust.
By mixing and matching these ingredients, you'll create mini cheesecakes tailored to your taste! For more tips on ingredient choices, check out The Spruce Eats.
Preparing Mini Cheesecakes
Making mini cheesecakes is a delightful experience that can easily charm your friends and family. Not only are they cute, but they also offer a personalized touch to your dessert table. Let's break down the steps to ensure your mini cheesecakes turn out perfectly!
Gather and prepare your ingredients
Start by gathering all your ingredients. This is an essential step to streamline the process. You’ll need:
- 1 (12 ounce) package of vanilla wafers
- 2 (8 ounce) packages of cream cheese, softened to room temperature
- ¾ cup of white sugar
- 2 large eggs
- 1 teaspoon of vanilla extract
- 1 (21 ounce) can of cherry pie filling for topping
After collecting your ingredients, preheat your oven to 350 degrees F (175 degrees C). Also, line two 24-cup miniature muffin tins with paper liners. This is where your mini cheesecakes will bake, so make sure they're ready!
Create the crust with vanilla wafers
Now it’s time to create a flavorful crust for your delectable mini cheesecakes. Crush your vanilla wafers using a food processor or by placing them in a resealable plastic bag and pounding them until fine crumbs form. You want about a ½ teaspoon of crumbs pressed into each paper liner to form the base. This crispy layer will complement the creamy filling beautifully!
Beat the cream cheese filling until fluffy
In a mixing bowl, combine the cream cheese, white sugar, eggs, and vanilla extract. Using an electric mixer, beat the mixture until it becomes light and fluffy—this should take about 2-3 minutes. The fluffiness is key to achieving that light texture in your mini cheesecakes. Don’t rush this step! The quality of your mixture will significantly impact the final product.
Fill the liners with the cheesecake mixture
Once your filling is fluffy, it’s time to fill the liners. Carefully spoon the cream cheese mixture into each mini muffin liner, filling them almost to the top. A small disher or a spoon works well for this task. Make sure to leave a little room for expansion as they bake—after all, no one wants overflowing cheesecakes!
Bake and cool the mini cheesecakes
Place your trays in the preheated oven and bake for about 15 minutes, or until the cheesecakes have set. You’re looking for a slight jiggle in the center; they will firm up as they cool. After removing them from the oven, allow the mini cheesecakes to cool completely in the pan. Give them about 30 minutes to cool on the counter before transferring them to the fridge for further chilling. Top each one with about a teaspoon of cherry pie filling right before serving.
With these steps, you’ll be well on your way to crafting delicious mini cheesecakes. For a twist, consider adding lemon zest or using chocolate wafer cookies for the crust! Don’t forget to check out this helpful guide on baking techniques and tips for even more baking success. Happy baking!

Variations on Mini Cheesecakes
Fun Toppings for Mini Cheesecakes
One of the best parts about mini cheesecakes is the endless topping possibilities! While cherry pie filling is a classic favorite, consider trying:
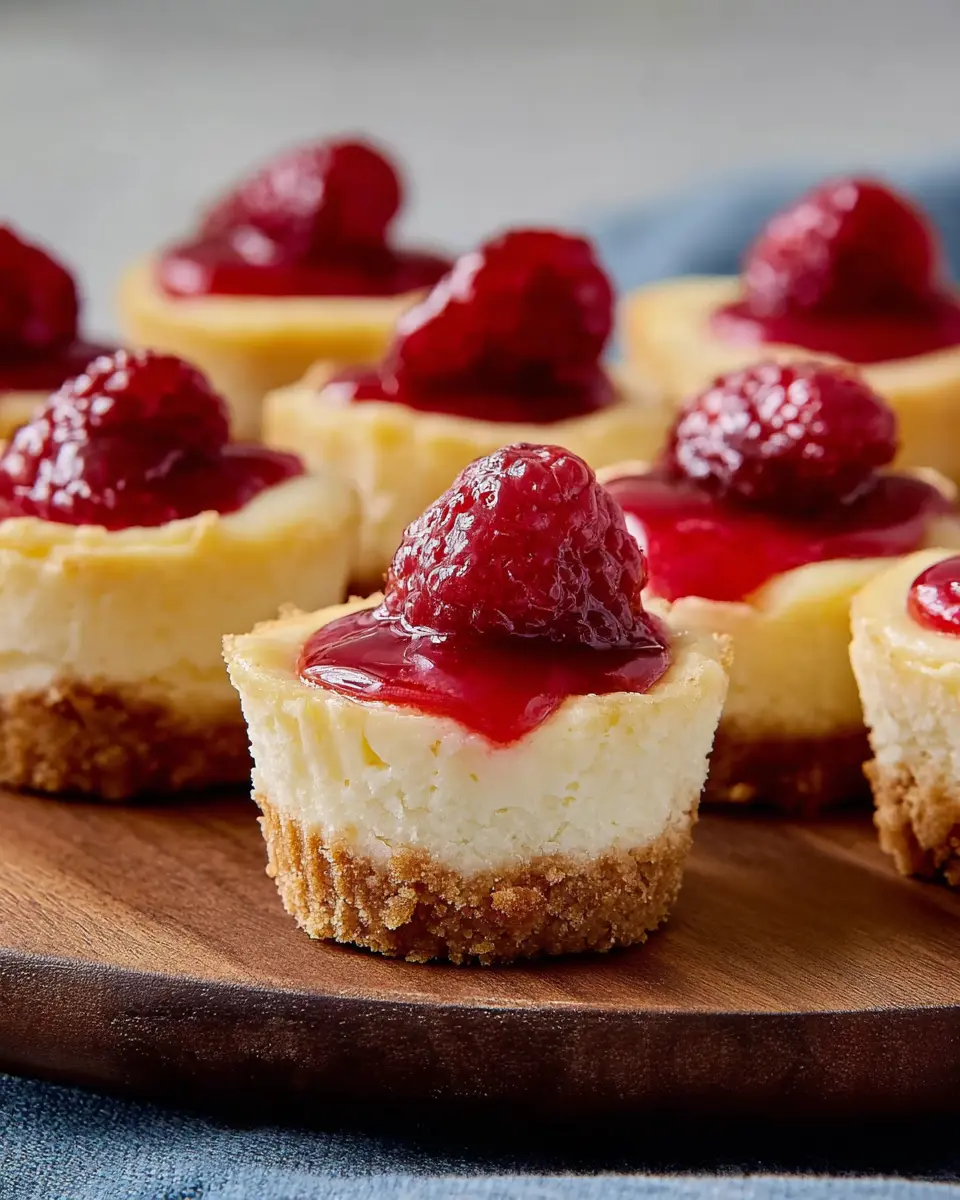
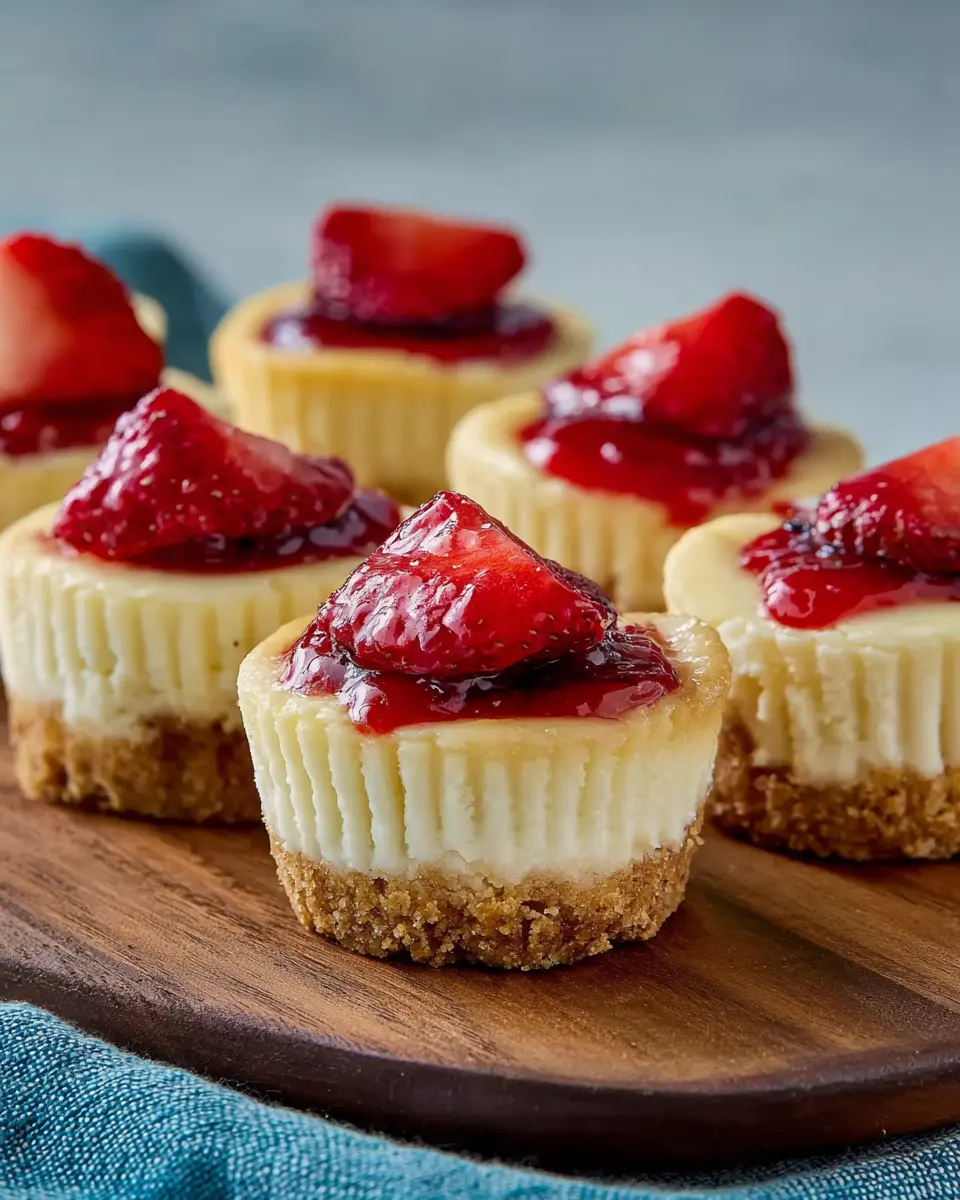
- Fresh berries like strawberries, blueberries, or raspberries for a burst of flavor.
- Drizzles of caramel or chocolate sauce for a decadent touch.
- A dollop of whipped cream sprinkled with crushed nuts for added crunch.
Each topping can transform your mini cheesecakes into a unique treat, perfect for impressing your guests or satisfying your sweet tooth.
Alternative Crust Options
While vanilla wafers create a delightful base, don't hesitate to mix it up! Here are a few alternative crust ideas:
- Use chocolate wafer cookies for a rich, chocolatey twist.
- Try crushed graham crackers for a traditional cheesecake feel.
- For a gluten-free option, opt for almond flour mixed with melted butter.
Experimenting with different crusts not only adds flavor but also changes the entire vibe of your mini cheesecakes. Don’t be afraid to get creative—you might stumble upon a new favorite!
Cooking Tips and Notes for Mini Cheesecakes
Common Mistakes to Avoid
Making the perfect mini cheesecakes is easier than you think, but there are a few common pitfalls to watch out for. First, ensure your cream cheese is at room temperature; this prevents lumps and ensures a smooth batter. Another tip: don’t overmix your filling. Overmixing can introduce air, leading to cracks as they bake. Lastly, let these little delights cool completely before adding toppings to preserve their shape.
Essential Tools for Success
To nail your mini cheesecakes, having the right tools makes all the difference. A good quality food processor or rolling pin for crushing vanilla wafers is essential for a fine crust. Using a sturdy muffin tin and quality paper liners ensures even baking and easy removal. Don't forget a rubber spatula for smooth filling and a cooling rack for proper cooling.
For a deeper dive into baking essentials, check out America's Test Kitchen for expert advice. Happy baking!
Serving suggestions for Mini Cheesecakes
How to present mini cheesecakes at gatherings
When showcasing your mini cheesecakes at events, presentation is key. Use a tiered dessert stand for an eye-catching display that draws guests in. Arrange the cheesecakes with colorful toppings, like the vibrant cherry pie filling or fresh berries, for that pop of color. Consider adding decorative labels for each flavor—it's a small touch that can spark excitement and conversation!
Pairing ideas for a delightful dessert experience
Complement your mini cheesecakes with brewed coffee or a selection of herbal teas to balance the sweetness. For those looking to indulge further, serve with side dishes like whipped cream or chocolate sauce for drizzling. Think about providing a fruit platter alongside your cheesecakes to brighten up the dessert table. Explore various toppings like crushed nuts or coconut flakes for added texture and flavor!
For more creative tips on dessert pairings, check out this guide on perfect dessert accompaniments!
Time Breakdown for Mini Cheesecakes
Preparation Time
Grab about 30 minutes for the prep. This includes gathering your ingredients and mixing the rich, creamy filling that makes these mini cheesecakes a crowd favorite.
Baking Time
Once prepped, bake these delightful treats for just 15 minutes. You'll want to keep an eye on them to ensure each bite is perfectly set and oh-so-delicious.
Total Time
In just 45 minutes, you’ll have a batch of scrumptious mini cheesecakes ready to impress your family and friends. Whether drizzled with cherry pie filling or topped with berries, these bite-sized delights are sure to be a hit!
For more tips on dessert preparation and presentation, consider checking out some resources on Baker's Edge for creative ideas!
Nutritional Facts for Mini Cheesecakes
Calories
Each mini cheesecake packs in about 95 calories, making them a delightful treat without derailing your diet. Perfect for satisfying that sweet tooth!
Protein
With just 1 gram of protein, these mini cheesecakes aren't your best source of muscle-building nourishment, but they certainly make up for it with flavor.
Sugar Content
These treats contain 6 grams of sugar, largely from the cream cheese and added sugar. While they’re sweet, it's wise to balance them with other nutritional choices throughout your day.
For a deeper dive into healthy eating and sugar content in desserts, check out Harvard Health Publishing.
FAQ about Mini Cheesecakes
How can I store leftover mini cheesecakes?
To keep your mini cheesecakes fresh, store them in an airtight container in the fridge. They can last up to five days. For longer storage, you can freeze them! Just wrap each cheesecake tightly in plastic wrap and then place them in a freezer-safe container. When you're ready to enjoy them again, let them thaw in the fridge overnight.
Can I make mini cheesecakes ahead of time?
Absolutely! These delightful mini cheesecakes are perfect for making ahead. Bake and store them in the fridge for up to three days before your event. Alternatively, you can freeze them (see above) and pull them out to defrost a day or two prior. This way, you'll have delicious treats ready to serve without the last-minute rush.
What substitutions can I make for the ingredients?
You can easily customize the recipe! For a gluten-free option, try almond flour or gluten-free cookies for the crust. If you're looking for a lower-sugar version, consider using a sugar substitute like stevia. Experiment with different toppings too; fresh berries or whipped cream can be delightful alternatives to cherry pie filling. For more ingredient swaps, check out resources like Food52.
Conclusion on Mini Cheesecakes
Final thoughts on enjoying homemade mini cheesecakes
Homemade mini cheesecakes are a delightful treat that everyone loves! Their versatility makes them perfect for any gathering, whether topped with cherry pie filling or fresh berries. So, indulge yourself and share with friends—the joy of creating and enjoying mini cheesecakes is one worth experiencing!

Mini Cheesecakes
Equipment
- mixing bowl
- Food processor
- muffin tins
Ingredients
Crust
- 1 package vanilla wafers 12 ounces
Filling
- 2 packages cream cheese 8 ounces each
- ¾ cup white sugar
- 2 large eggs
- 1 teaspoon vanilla extract
Topping
- 1 can cherry pie filling 21 ounces
Instructions
Preparation
- Gather all ingredients.
- Preheat the oven to 350 degrees F (175 degrees C). Line two 24-cup miniature muffin tins with paper liners.
- Crush vanilla wafers in a food processor or resealable plastic bag until fine crumbs form. Press about ½ teaspoon crumbs into each paper liner.
- Beat cream cheese, sugar, eggs, and vanilla in a mixing bowl until light and fluffy. Fill each miniature muffin liner with this mixture, almost to the top.
- Bake in the preheated oven for 15 minutes until the cheesecake is set. Cool completely in the pan. Top each mini cheesecake with about a teaspoon of cherry pie filling before serving.
- Serve and enjoy!

Leave a Reply