
Introduction to Taiyaki Recipe
What is Taiyaki and Why It's Special?
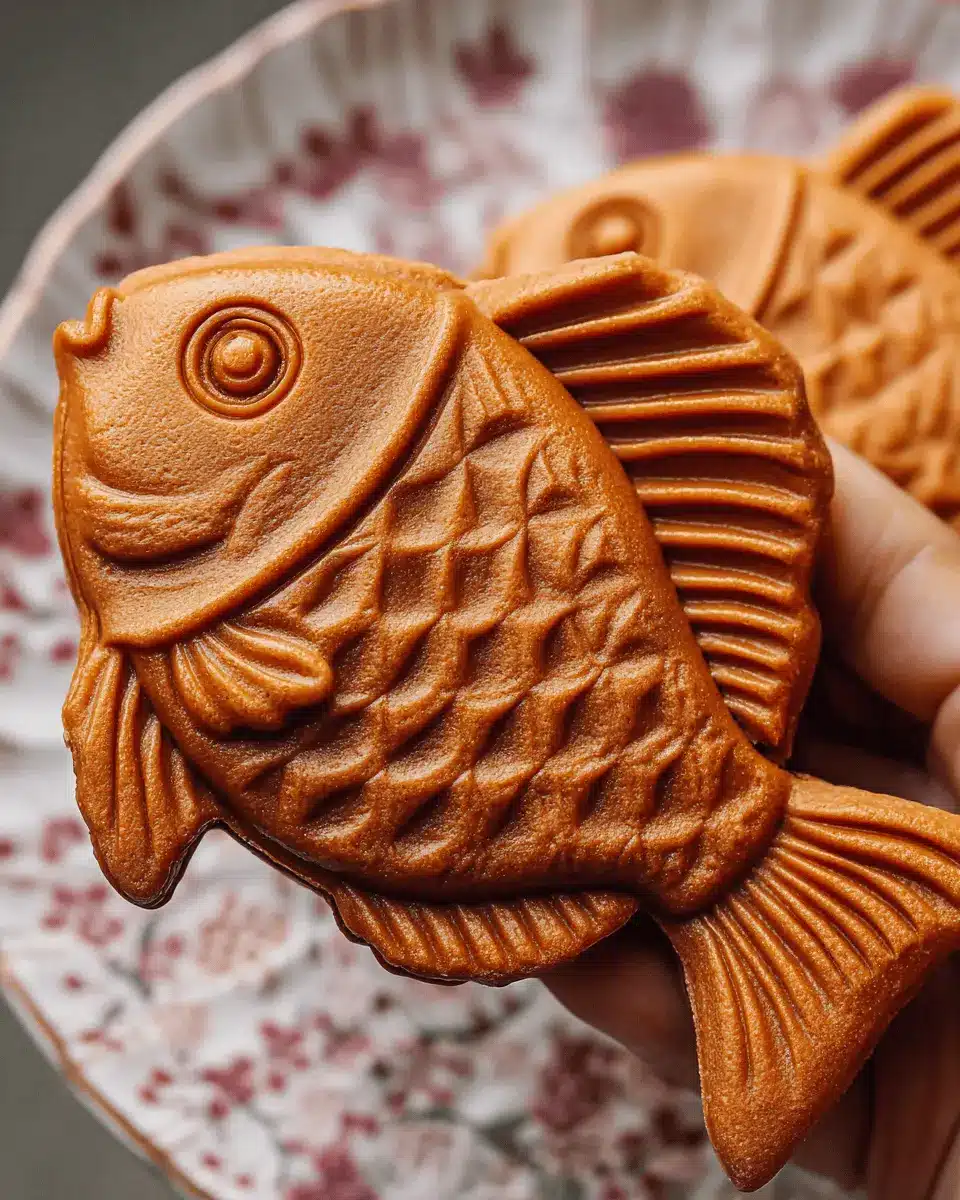
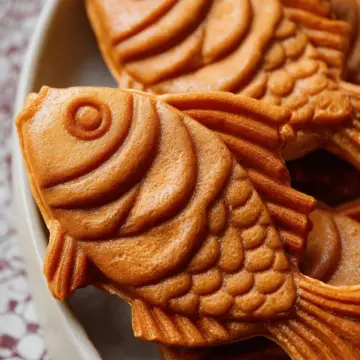
Taiyaki (たい焼き) is a beloved Japanese fish-shaped pastry that combines the charm of creative presentation with a delightful burst of flavor. Traditionally filled with sweet anko (red bean paste), this unique treat is typically enjoyed warm, making it a popular snack found at festivals and street stalls across Japan. What sets taiyaki apart is not only its cute fish shape but also its crispy outer layer that contrasts beautifully with the soft and sweet filling inside.
This delightful pastry traces its origins back to the early 20th century and has since evolved to include various fillings, such as custard, chocolate, and even savory options like sweet potato or cheese. Each taiyaki experience is customizable, catering to a wide array of taste preferences.
Making this taiyaki recipe at home allows you to bring a piece of Japanese culture into your kitchen while impressing friends or family with your culinary skills. Plus, it’s a fun activity you can share with loved ones! So let’s dive into this recipe and uncover the delicious potential that taiyaki has to offer.
For a step-by-step guide to achieve the perfect fish-shaped pastry, check out the full recipe below!
Ingredients for Taiyaki
Essential ingredients for a perfect Taiyaki
Creating the ideal Taiyaki requires just a handful of simple yet essential ingredients:
- Cake flour: A fine flour that gives your pastry the perfect texture. It’s light and tender, making it a staple in this recipe.
- Shiratamako: This glutinous rice flour adds a delightful chewy quality to the batter.
- Baking powder and baking soda: These leavening agents help achieve that coveted rise, contributing to a fluffy interior.
- Milk: It enriches the batter, creating a luscious mouthfeel.
- Unsalted butter: Adds a buttery flavor that complements the sweetness nicely.
- Honey and vanilla extract: These natural sweeteners enhance the overall taste profile.
- Anko (sweet red bean paste): The classic filling that many know and love, bringing that authentic Taiyaki experience to every bite.
Optional ingredient variations
Feel free to get creative with your Taiyaki recipe! Here are some optional ingredients to mix things up:
- Matcha powder: For a unique green tea flavor and a beautiful color.
- Chocolate or custard: These alternative fillings can appeal to sweet tooths looking for something different.
- Nuts or fruits: Chopped nuts or fruit purees can add texture and a burst of flavor.
- Spices: Don't hesitate to sprinkle in a bit of cinnamon or cardamom for an extra flavor dimension.
Experimenting with different ingredients can make your Taiyaki uniquely yours! For more information on specific ingredients like anko, check out this guide.
Step-by-Step Preparation of Taiyaki
Making delicious Taiyaki at home is an exciting culinary adventure! Let’s walk through the steps together to ensure that your fish-shaped pastry turns out perfectly every time.
Gather your equipment and ingredients
Before diving in, it's essential to have everything ready. Here’s what you’ll need:
-
Equipment:
-
Taiyaki pan (you can find a great one here)
-
Medium glass bowl
-
Strainer
-
Pastry brush
-
Ingredients:
-
2 teaspoons vegetable oil
-
75 grams cake flour (~½ cup)
-
25 grams shiratamako (~2 tablespoons)
-
¼ teaspoon baking powder
-
¼ teaspoon baking soda
-
½ cup milk
-
2 tablespoons cultured unsalted butter
-
1 tablespoon honey
-
½ teaspoon vanilla extract
-
120 grams anko (sweet red bean paste, learn how to make it here)
Prepare the Taiyaki batter
Start by combining your dry ingredients. In a medium bowl, sift together cake flour, shiratamako, baking powder, and baking soda. This ensures a smooth, lump-free batter. While that rests, prepare your wet ingredients by warming the milk, butter, honey, and vanilla extract together in the microwave until the butter melts—just about 50 seconds should do!
Combine the wet and dry ingredients and whisk until smooth. Remember, the batter should be free of lumps for the best results!
Heat the Taiyaki pan
Now it’s time to heat your Taiyaki pan! Set it on your stove to the lowest heat setting and let both sides warm up to about 285°F (140°C). This helps cook the Taiyaki evenly, giving it that perfect outer crispness while keeping it soft inside.
Grease the mold
For easy removal, lightly grease the Taiyaki mold with a paper towel soaked in vegetable oil. Look for a thin, even layer—avoiding puddles of oil will give you a neater pastry.
Pour and shape the batter
Pour about 1 tablespoon of batter into the left and right sides of the mold. Use the pastry brush to help it rise up into the tail and sides, shaping the fish. Don't be shy—this part is crucial for achieving that iconic Taiyaki shape!
Fill with anko and finish cooking
Once the batter has set, add a heaping tablespoon of anko down the center. Press it lightly to avoid any peaks; this ensures even baking. Pour another tablespoon of batter over the anko and spread it to the edges.
Check for doneness and serve
After closing and flipping the pan, let it cook for about 4 minutes total (2 minutes on each side). Open carefully and check the color—it should be golden brown. If it looks too light, feel free to cook it a little longer. Once done, gently remove your Taiyaki. Serve warm and enjoy the delightfully crisp shell with the sweet, gooey anko inside!
With these straightforward steps, you're well on your way to mastering this delightful Taiyaki recipe! Happy cooking!

Variations on Taiyaki
Sweet Taiyaki options
While the classic red bean paste filling is a must-try, don’t hesitate to experiment with other sweet fillings! Options include creamy custard, rich chocolate, or even tangy matcha paste. For a fun twist, try filling your taiyaki with seasonal fruits or a drizzle of caramel sauce. You can also incorporate ice cream for an indulgent dessert on warmer days!
Savory Taiyaki ideas
If you’re in the mood for something savory, the possibilities are endless. Fill your taiyaki with a mixture of chicken ham and cheese for a gooey delight, or opt for turkey bacon with a sprinkle of fresh herbs. You could also try a vegetarian option with sautéed mushrooms and spinach for a delectable bite. These savory spins make a delightful twist on the traditional taiyaki recipe!
Cooking Tips and Notes for Taiyaki
Troubleshooting Common Issues
When making your Taiyaki, you might encounter a few hiccups. If the batter sticks to the mold, ensure it's well-greased with no excess oil. Cooking at too high a temperature can also lead to uneven browning; keep it low and slow for the best texture. Should your Taiyaki come out too chewy, check your flour measurements—overworking the batter can tighten the gluten and alter the outcome.
Storage Tips for Leftovers
To keep your leftover Taiyaki fresh, store them in an airtight container at room temperature for up to two days. Alternatively, you can freeze them! Just wrap each pastry tightly in plastic wrap and place them inside a freezer-safe bag. When you're ready to enjoy, simply reheat in a toaster or oven for that crispy texture. For more insights on preservation techniques, check out this guide.

Serving Suggestions for Your Taiyaki
Perfect pairings and accompaniments
When enjoying your delightful taiyaki, consider serving it alongside some fantastic accompaniments to elevate the experience. A drizzle of matcha syrup or a sprinkle of powdered sugar can add a touch of sweetness that beautifully contrasts with your filling. For a refreshing twist, pair your taiyaki with a bowl of mochi ice cream; the creamy texture complements the crispy, warm pastry perfectly.
Feel adventurous? Try dipping your taiyaki in rich chocolate sauce for a modern take. If you’re looking for something to drink, a steaming cup of green tea or a cool glass of coconut water complements the flavors wonderfully. These suggestions ensure your taiyaki experience is both satisfying and memorable!
Time Breakdown for Taiyaki
Preparation Time
The preparation time for this delightful Taiyaki recipe is just 10 minutes. This includes mixing the batter and getting everything ready for cooking.
Cooking Time
Once your batter is set, the cooking time takes about 10 minutes to achieve that perfectly golden and crispy exterior.
Total Time
Putting it all together, your total time spent for making delicious Taiyaki is approximately 20 minutes. It’s worth every minute for these tasty treats!
Want to elevate your Taiyaki skills further? Check out this comprehensive guide on Asian pastries for more inspiration.
Nutritional Facts for Taiyaki
When indulging in this delightful Japanese fish-shaped pastry, here are the nutritional highlights you should know:
Calories
A single serving of Taiyaki contains approximately 278 calories, making it a satisfying sweet treat without going overboard.
Sugar Content
With around 20 grams of sugar, this pastry delivers a delightful sweetness, primarily from the fillings like anko or sweet red bean paste.
Protein Levels
Taiyaki packs about 5 grams of protein per serving, helping to keep you feeling full and satisfied after this delicious snack.
For more detailed insights, check out nutritional databases such as NutritionData for comprehensive profiles on Taiyaki ingredients and similar treats. Whether you're making it at home or savoring it from a local shop, understanding these facts can enhance your culinary experience!
FAQ about Taiyaki Recipe
Can I use different fillings for Taiyaki?
Absolutely! While traditional Taiyaki is often filled with sweet red bean paste (anko), the beauty of this pastry lies in its versatility. Popular alternatives include custard, chocolate, sweet potato, and even savory options like cheese or meat. Feel free to get creative and try fillings that suit your taste!
How do I make Taiyaki without a special pan?
Don’t worry if you don’t have a Taiyaki pan! You can use a regular frying pan or an electric griddle. Just shape the batter into small fish-like forms or use a fish-shaped mold if available. Cook one side until golden, flip, and then add your filling before flipping again for even cooking.
Can Taiyaki be made in advance?
Yes, you can prepare Taiyaki ahead of time! Simply cook the pastries, let them cool, and store them in an airtight container in the fridge for up to two days. Reheat them in a toaster oven for a few minutes to regain their crispiness before serving. Enjoy your homemade treat anytime!
Conclusion on Taiyaki Recipe
Making Taiyaki at home is a delightful culinary adventure. You’ll enjoy the rewarding process of creating these charming fish-shaped pastries filled with sweet red bean paste. Plus, customizing your fillings is a fun way to express your creativity. So gather your ingredients, and let’s get cooking!
Why You Should Try Making Taiyaki at Home
-
Unique Experience: Crafting Taiyaki offers a charming glimpse into Japanese culture right from your kitchen. You can impress friends and family with these delightful pastries.
-
Customization: One of the best parts? You can fill your Taiyaki with whatever your heart desires—red bean paste, custard, chocolate, or even savory ingredients!
-
Satisfying Results: There’s nothing quite like biting into a freshly made Taiyaki—the crispy exterior giving way to a warm, gooey filling. Trust me, the effort is worth it!
For detailed instructions, don’t forget to check out the full Taiyaki recipe here!
Taiyaki (たい焼き): Japanese Fish‑Shaped Pastry
Equipment
- Taiyaki pan
- Medium Glass Bowl
- Strainer
- Pastry Brush
Ingredients
- 2 teaspoons vegetable oil
- 75 grams cake flour (~½ cup)
- 25 grams shirata miko (~ 2 tablespoons)
- ¼ teaspoon baking powder (1.2 grams)
- ¼ teaspoon baking soda (1.5 grams)
- ½ cup milk
- 2 tablespoons cultured unsalted butter
- 1 tablespoon honey
- ½ teaspoon vanilla extract
- 120 grams anko
Instructions
- Make a paper towel into a tight ball and soak it in the vegetable oil. Do this first so the oil can fully soak into the paper towel.
- Add the cake flour, shiratamako, baking powder, and baking soda to a strainer set over a medium bowl and sift the ingredients together.
- Add the milk, cultured unsalted butter, honey, and vanilla extract to a microwave-safe bowl and heat for 50 seconds in a microwave oven set to 600 watts. Whisk the mixture together until the butter is fully dissolved.
- Dump the wet ingredients into the dry ingredients and whisk together until the Taiyaki batter is smooth and free of lumps.
- Heat both sides of the Taiyaki pan to about 285°F (140°C) with the stove at its lowest setting.
- Use your oil-soaked paper towel to lightly grease the mold. There shouldn't be any bubbles of oil on the surface of the pan.
- Add 1 tablespoon of batter to the left and right sides of the mold. Use a heat-safe pastry brush to paint the batter into the tail and up the sides of the mold.
- Once the batter has set, turn the pan so the top half of the mold is over the fire.
- Add 1 tablespoon of batter to the left and right sides of the mold and use the pastry brush to spread it around as you did before.
- Add about 1 heaping tablespoon of anko down the center of the mold and press it down a bit so there are no peaks.
- Pour over a generous tablespoon of batter and use the brush to spread it to the edges.
- Close and lock the lid, and then immediately flip the pan over. Let this cook for 2 minutes. Next, flip the pan and cook for another 2 minutes on the second side.
- Open the lid and check the color. If it's still looking light, you can continue cooking it until it becomes golden brown and crisp. If the Taiyaki sticks to the pan, heat the side that's sticking over the stove and use a skewer or toothpick to help release it.


Leave a Reply